 In Good Flavor
Turn some of your favorite cereal brands into waffle cones!! Learn how to make waffle cones that taste like Froot Loops, Cocoa Krispies, or other cereals. Now you can enjoy homemade ice cream cones in a variety of flavors all summer!!

Have you ever wondered why ice cream cones don’t come in a variety of flavors? I have!! I created these cereal flavored waffle cones many years ago and finally decided to share them with you all. They are so fun and easy to make…especially if you have little kiddos in your life.
The cones are absolutely delicious as they take on the flavor of the cereal. They are crispy and crunchy and add a new dimension to your ice cream-eating experience. In fact, they will revolutionize it! Imagine enjoying Cinnamon Toast Crunch, Froot Loops, Cocoa Krispies, or Cap’n Crunch waffle cones with your ice cream. I can tell you, they are pretty darn good!! Dare I say to the point where you don’t even need ice cream?!


Well, you can make them!! You will need a few special equipment before you can get started. These are my recommendations, but get any brand you want.
- Waffle cone and ice cream cone maker—I have this waffle cone maker model, which works very well. It comes with an ice cream cone mold, which you will need.
- Ice cream cone mold—might not be needed if your waffle cone maker comes with one.
- A food processor—this model has a 4-cup capacity, perfect for the small amount of pulverizing needed.
- Small wire whisk—I have this 8-inch dishwasher-safe whisk.
I know these waffles will be a hit if you make them!!! So make this the first summer of your summer tradition of making cereal-flavored waffle cones to enjoy with your ice cream!
Ingredients needed:
Because the cereal is already flavored, only a few simple ingredients are needed to create these super tasty cones.
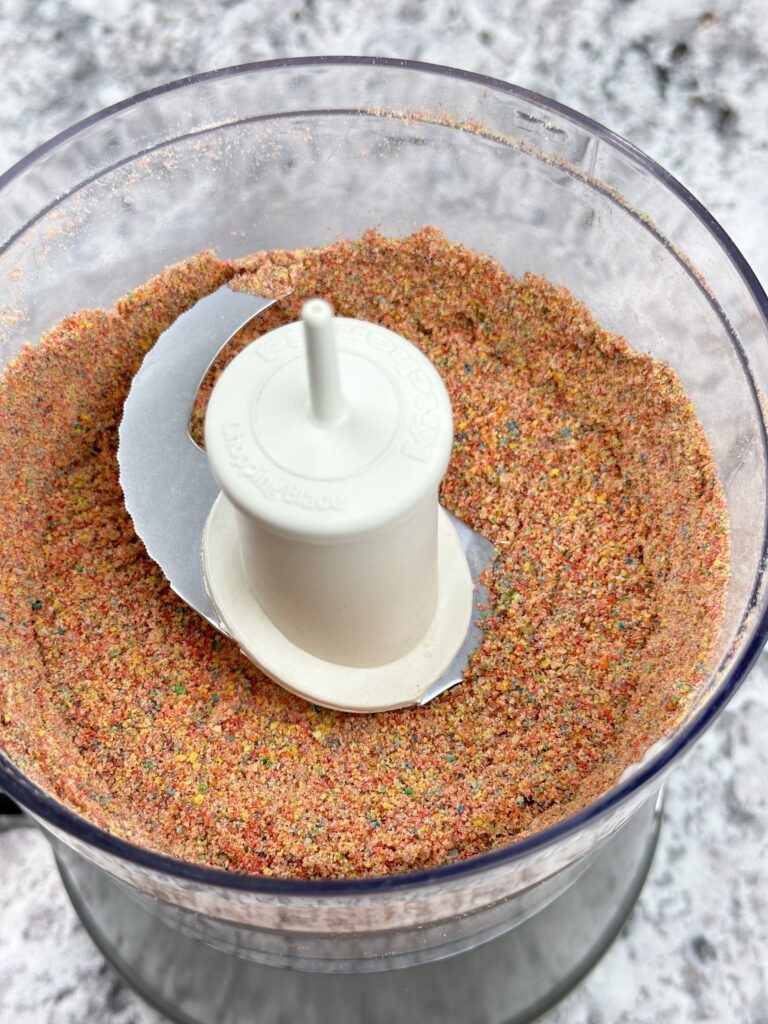
- Cereal—choose from a variety of cereals, such as Froot Loops, Cocoa Krispies, Honey Nut Cheerios, Fruity Pebbles, Corn Pops, Frosted Flakes, Cinnamon Toast Crunch, Cap’n Crunch, or another of your choosing. Run the cereal through the food processor to pulverize it into flour or coarse cornmeal consistency.
- Butter—for flavoring and crispiness.
- Sugar—use granulated. Adds sweetness and helps waffle cones become crispy.
- Egg whites—act as a binder and for structure.
- Flour—provides extra gluten for added structure.
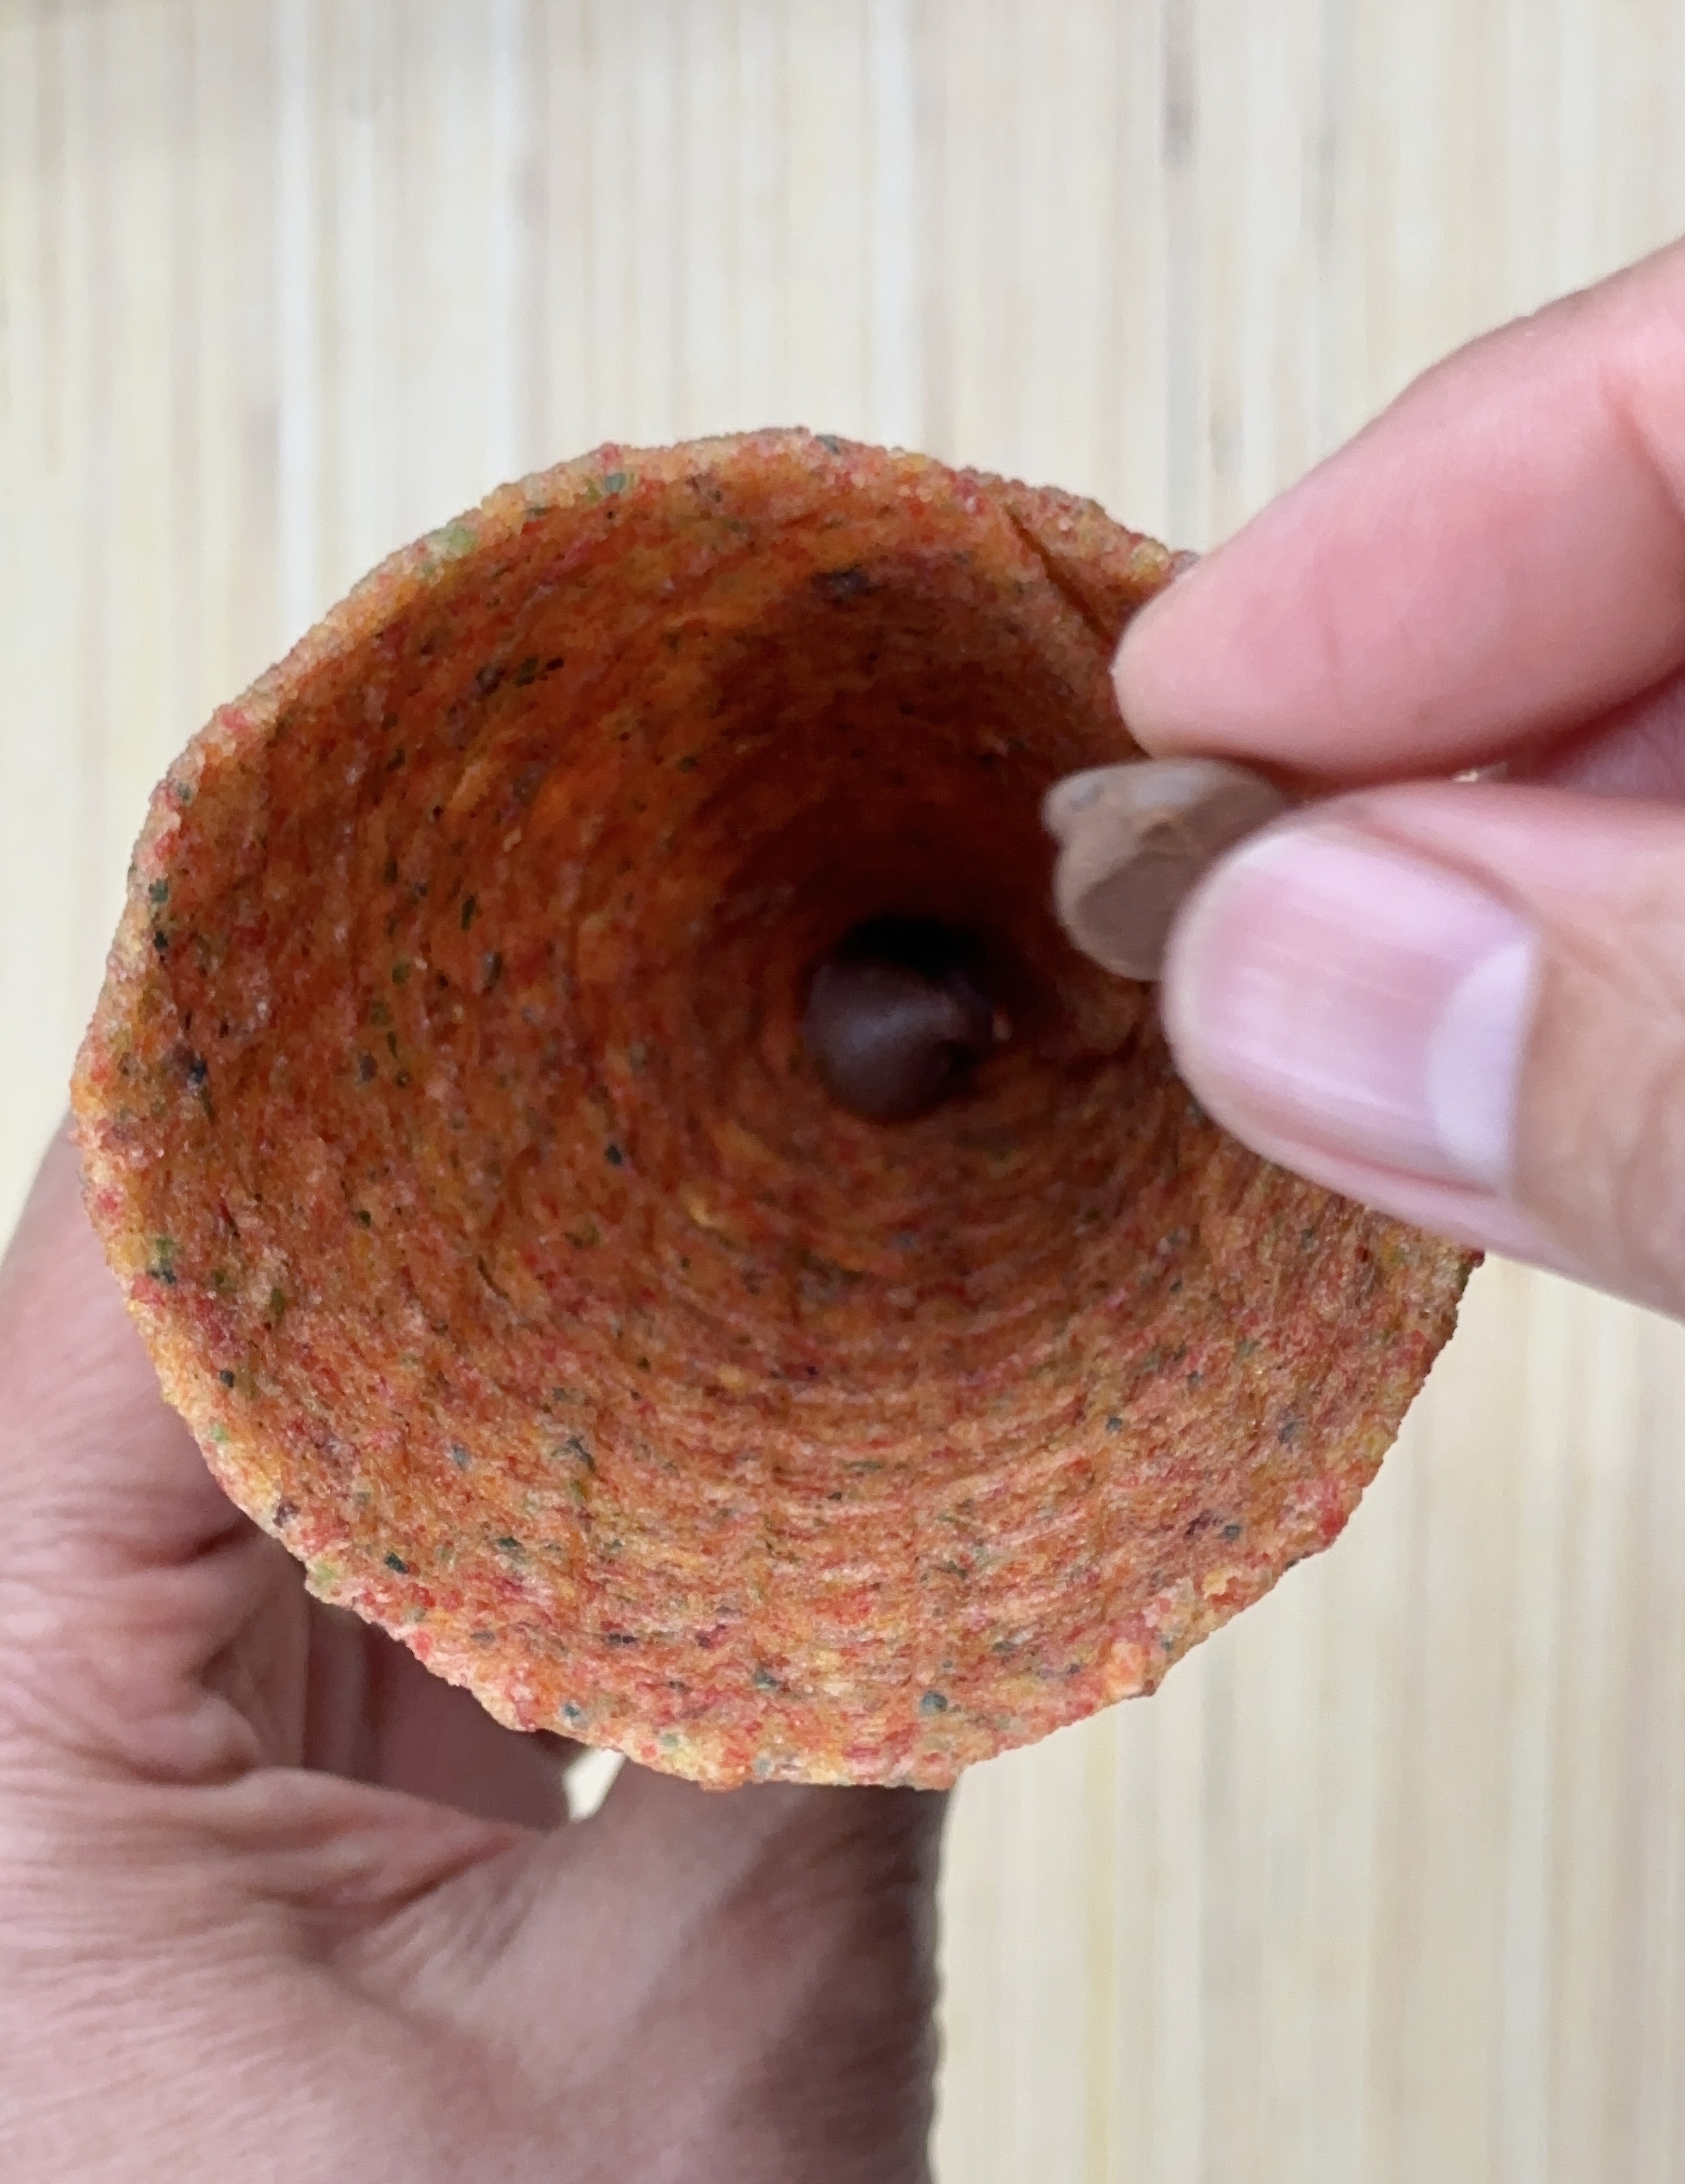
- Chocolate chips—are dropped into the bottom of the cone while warm to plug the hole at the tip. Use either white or chocolate chips.

Recipe highlights:
- Pulverize cereal in a food processor. Measure out 3/4 cup.
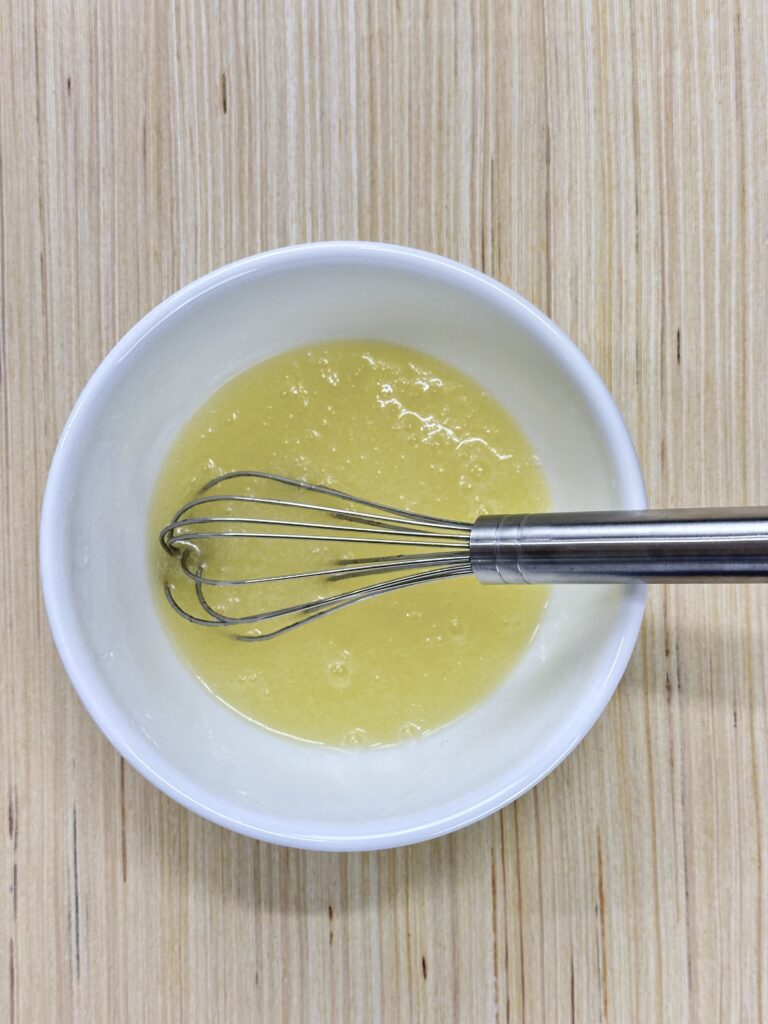
- In a small mixing bowl, whisk melted butter and sugar. Whisk in egg whites.
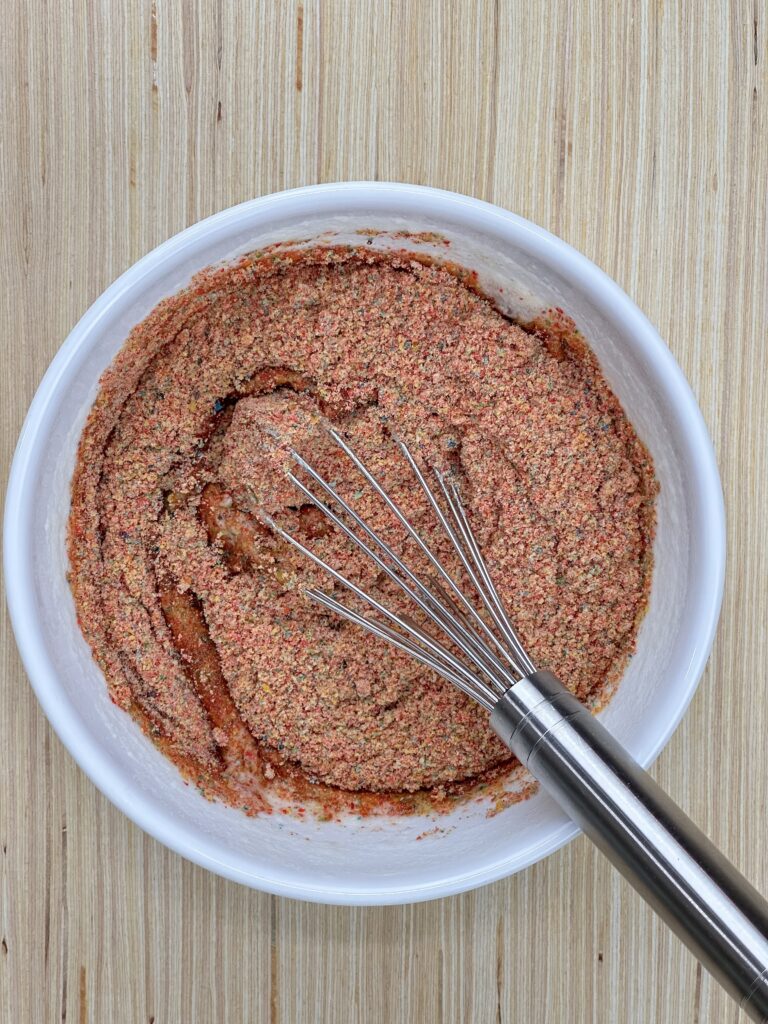
- Whisk in cereal, then flour.
- The batter should be thick enough to cling onto a spatula but thin enough to fall off in sheets or clumps.

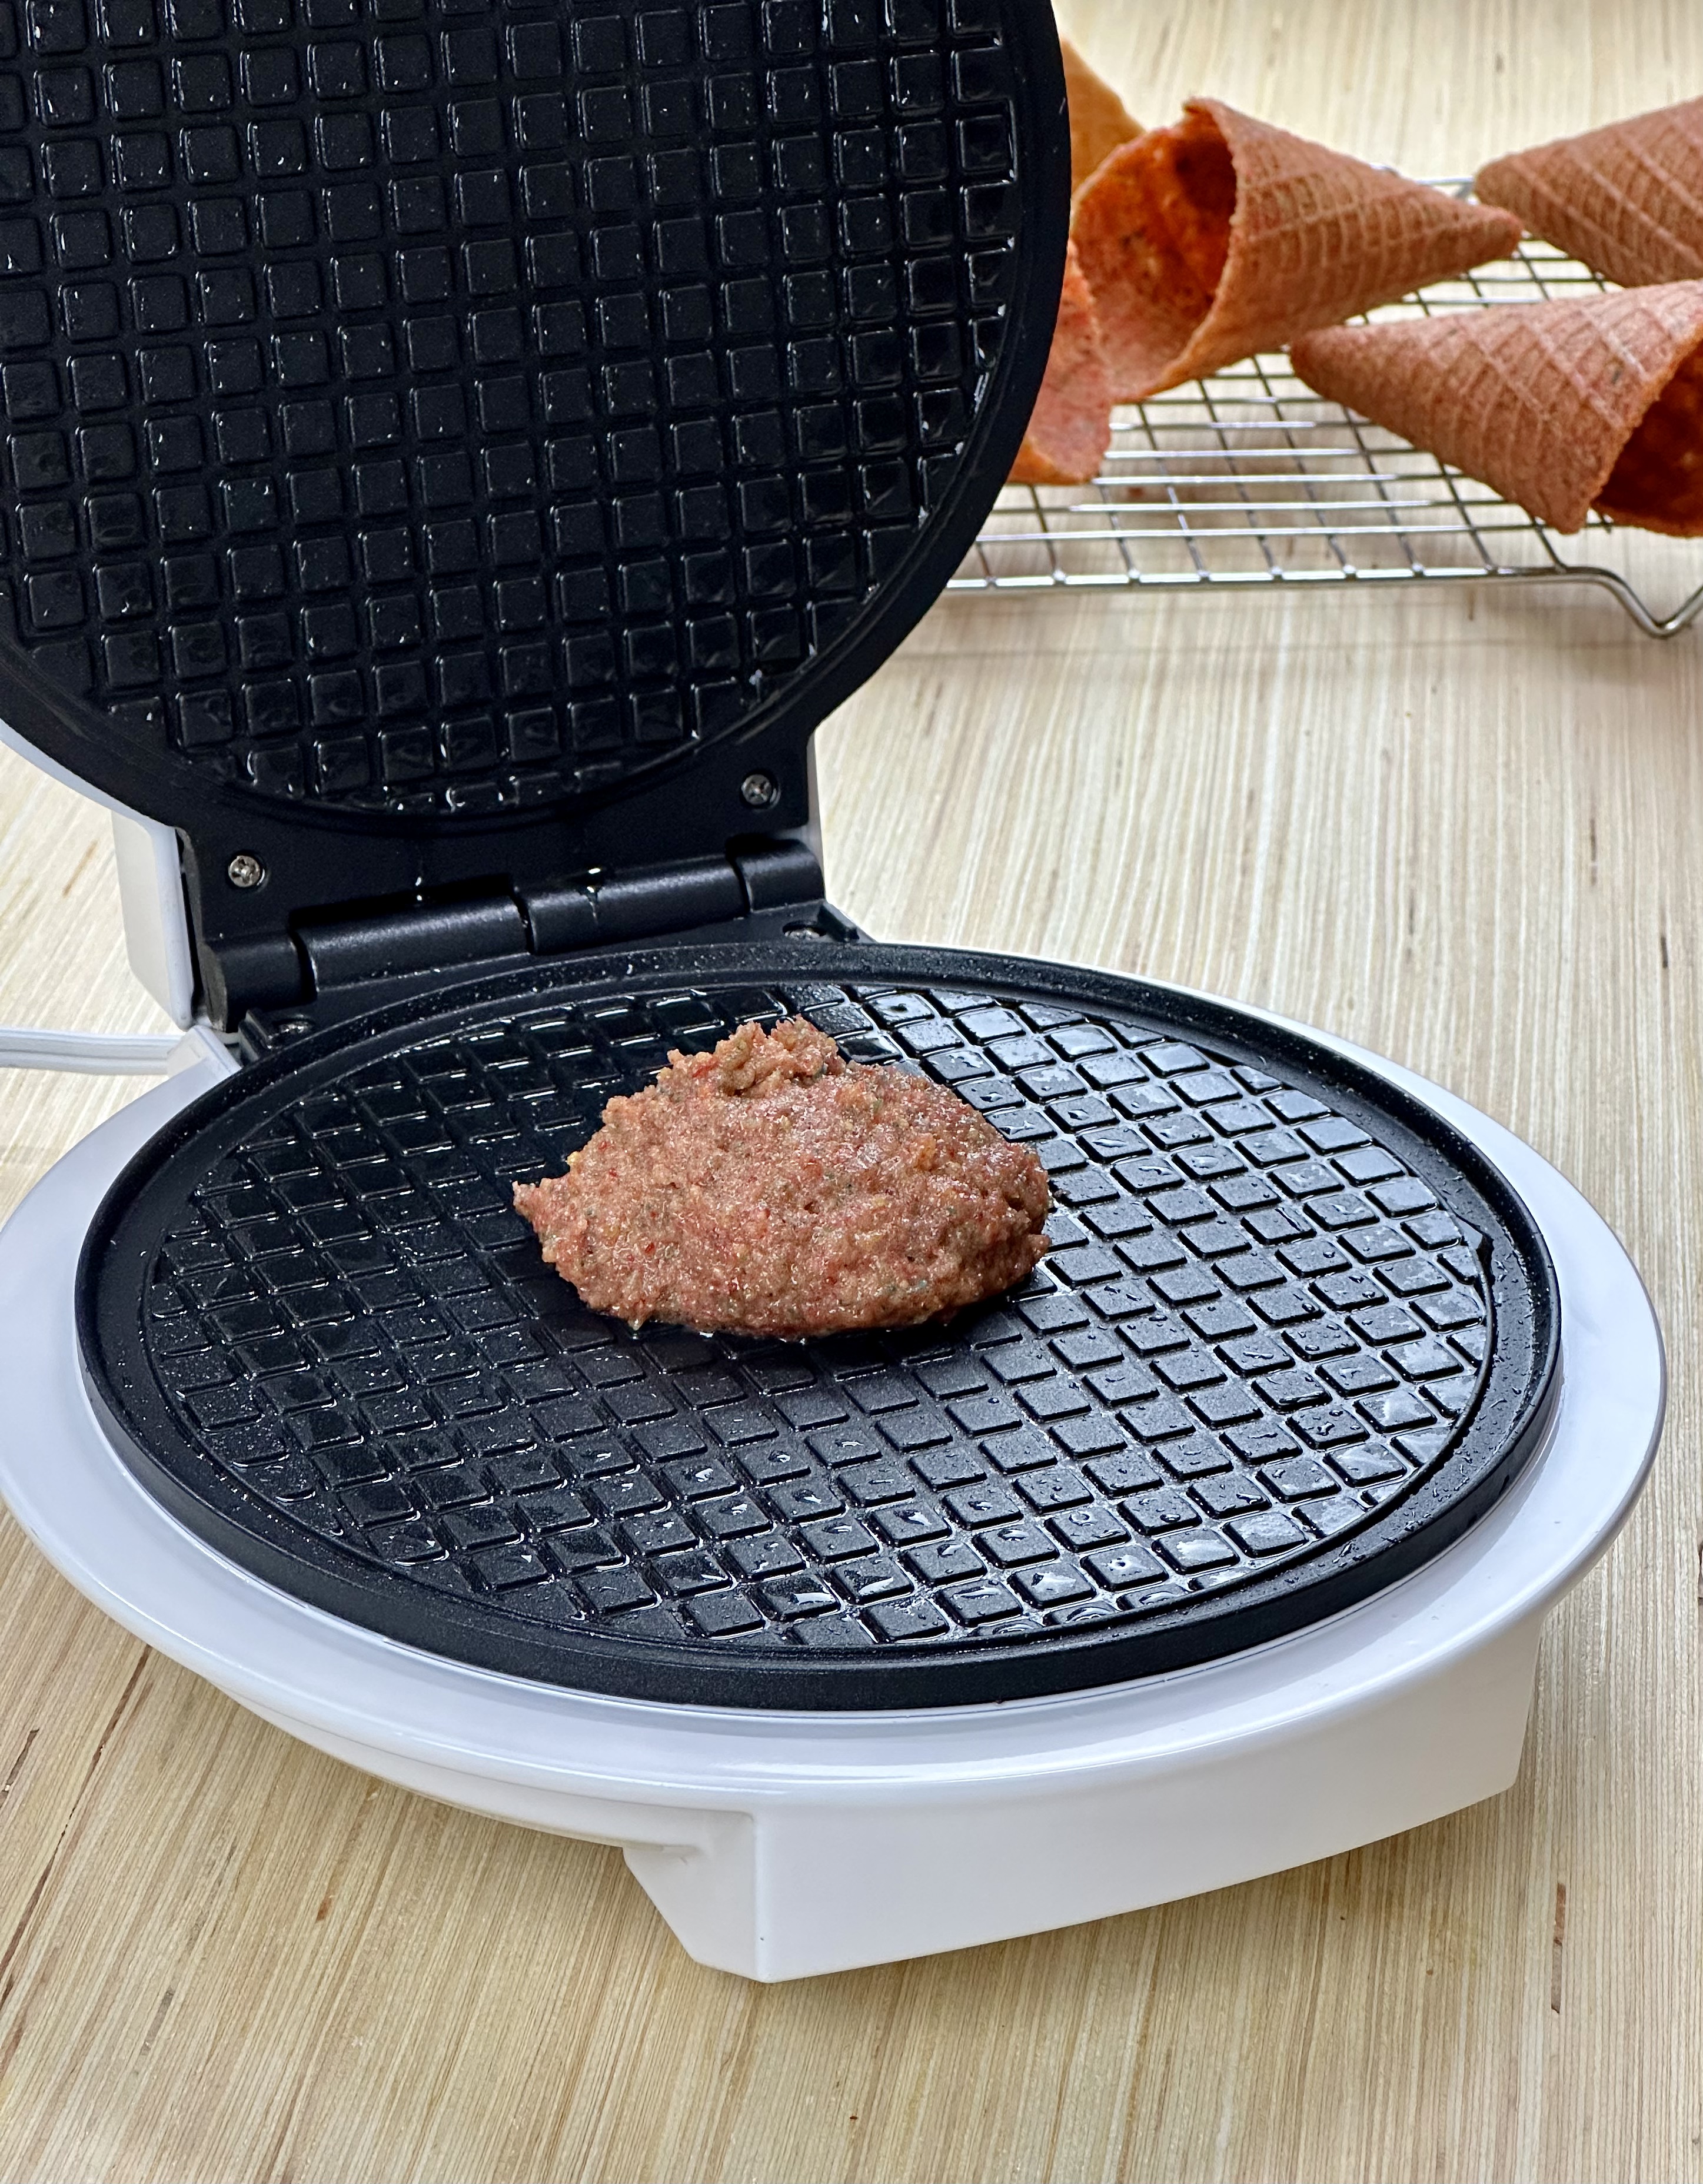
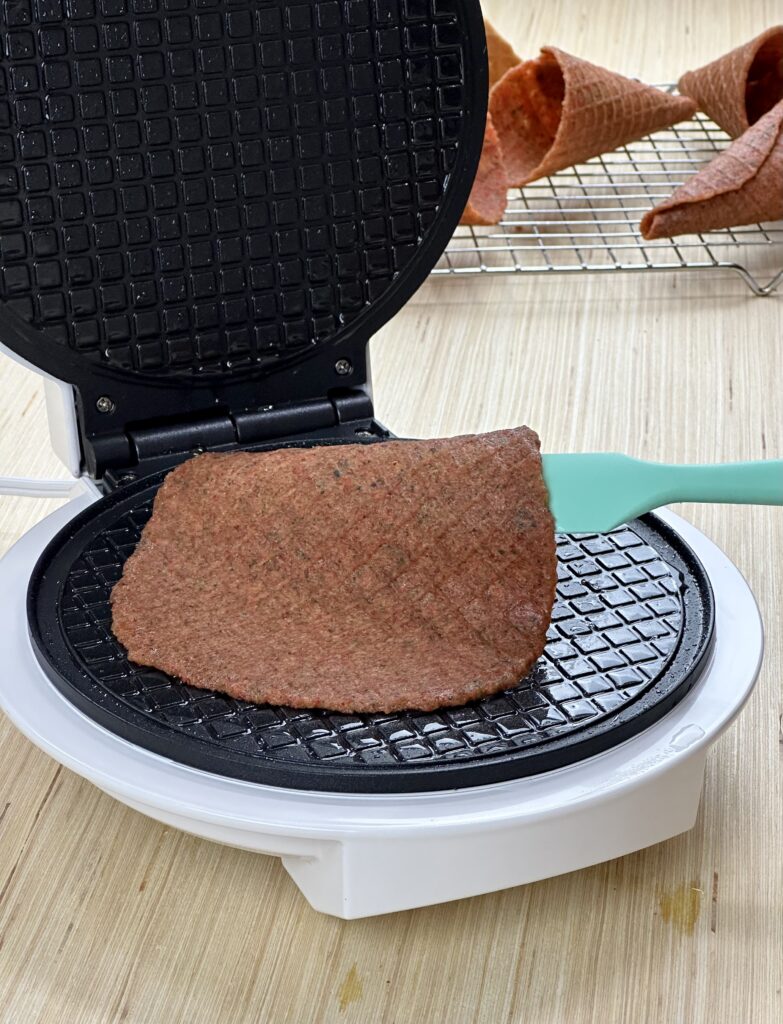
- Place a dollop of batter onto a waffle cone maker. Cook for 2-4 minutes (depending on your model).
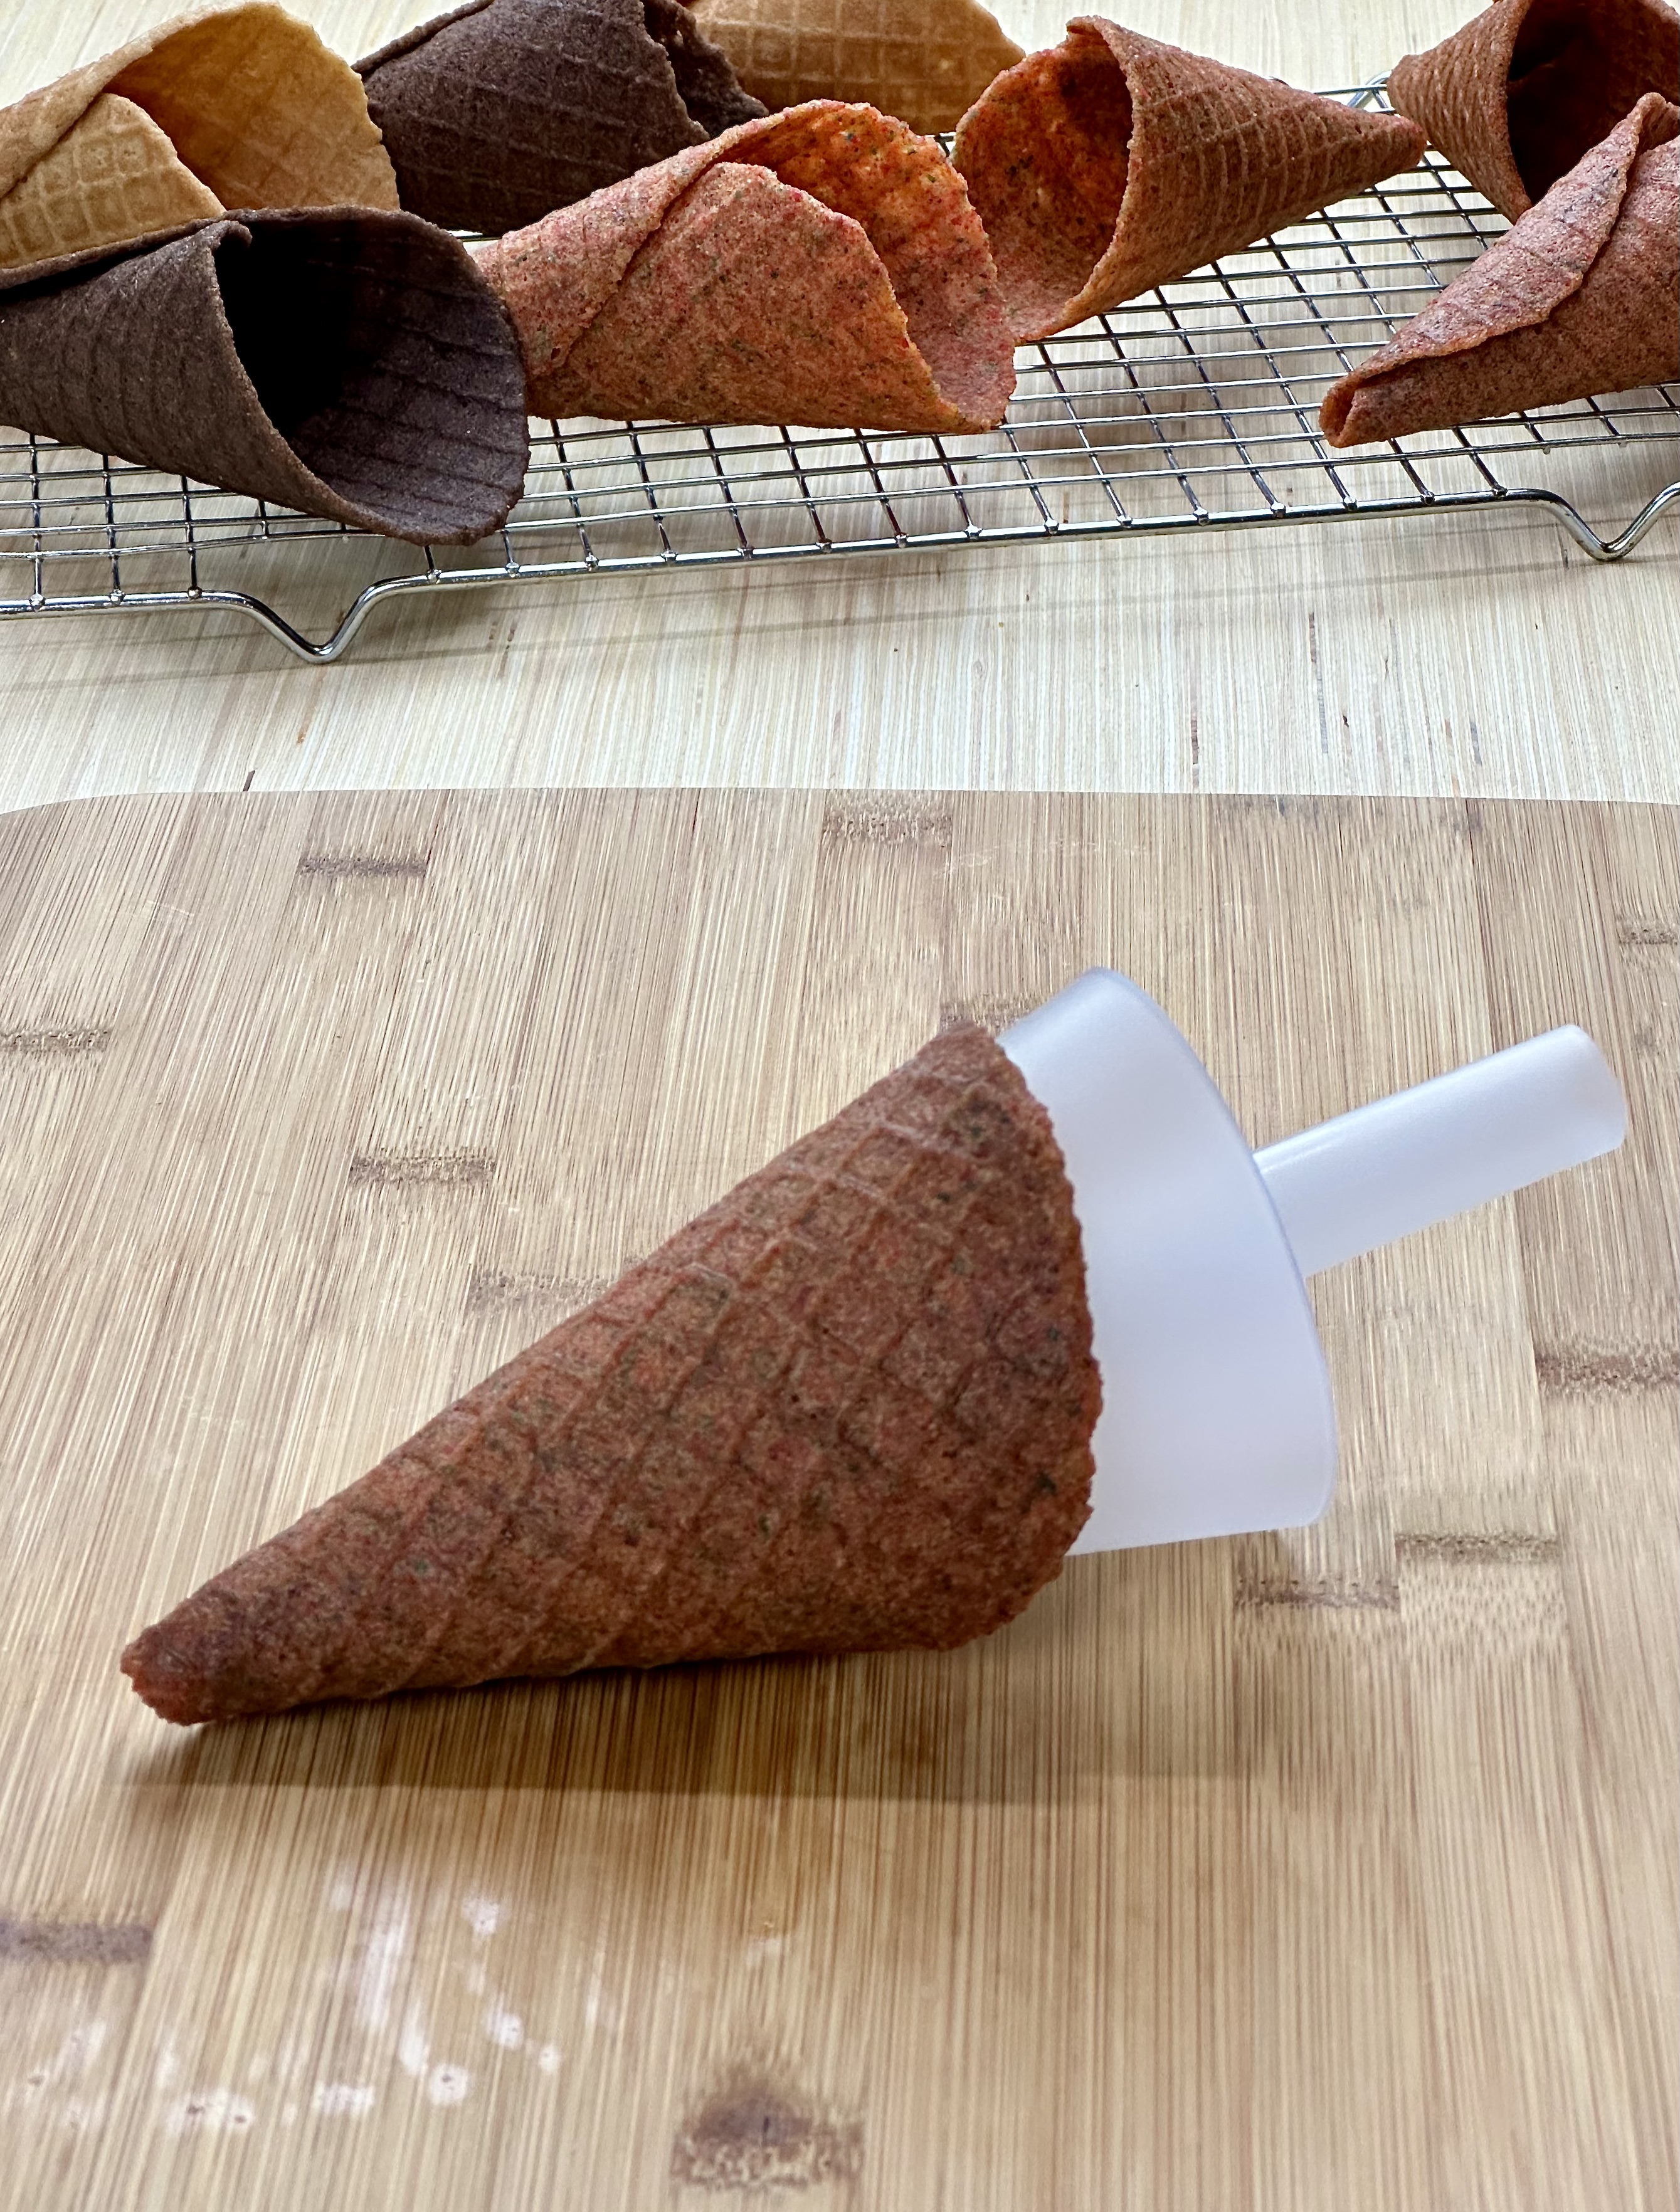
- Transfer to a flat work surface. Wrap the waffle around the mold to form a cone. Press down on the seam for 20 seconds.
- While warm, drop a few chocolate chips into the bottom of the cone to plug the hole. Allow the cone to cool on a wire rack, seam side down.
- Continue cooking the remaining batter.
- Detailed instructions are in the recipe card below.
View the how-to video or save it for later with this Pinterest Pin.
Can you use any kind of cereal?
Naturally, I have not tested this recipe on ALL cereals. But I have tested it on Froot Loops, Cocoa Krispies, Honey Nut Cheerios, Fruity Pebbles, Corn Pops, Frosted Flakes, Cinnamon Toast Crunch, and Cap’n Crunch. Therefore, this application should work on a plethora of others.
What not to use? To be honest, I have not tested cereal that has components like marshmallows and dried fruit. I don’t believe they would pulverize cohesively and would not be good for making cones. Their addition will most likely affect the crispiness of the cones. They may also cause sticking issues with the waffle cone maker. But feel free to experiment if you like! I would love to know how it turns out!
What consistency should the batter be?
For most of the cereals tested, milk is not necessary. If the batter is allowed to sit too long, it may thicken enough that adding a couple of teaspoons of milk will loosen it up.
The batter should be thick with a little bit of fluidity. When scooped up with a spatula and tipped to allow it to fall freely, it should slowly cascade off or fall in clumps.
When in doubt, err on the side of a slightly thick batter, as adding too much liquid will make the cones soft.


How to tell when the cones are done?
Check the manufacturer’s instructions on how long to cook the waffles. Generally, it requires 2-4 minutes. My waffle cone maker takes about 3.5 to 4 minutes, with the dial cranked up three-quarters of the way.
The best way to gauge doneness is by visual cues. The cooked areas will look slightly darker than the uncooked batter. You want 3/4 of your cone to take on the darker shade before you remove it from the waffle iron. If a distinct color variation is not visible, look for the outer perimeter of the waffle—it should appear slightly darker and crispy all around when the waffle is done.
How to store:
Allow the cones to cool completely before storing. Place them in an airtight container and store them for up to a week at room temperature and two weeks refrigerated.
I prefer to keep the cones in the refrigerator to extend their shelf life and keep them crisp. Storing them at room temperature puts them at risk of softening, especially in humid weather.
Pro tips:
- When in doubt, err on the side of slightly thicker dough rather than adding milk. Too much milk will make the cones less crispy. If needed, add 1 teaspoon at a time, up to 2 teaspoons.
- The cones may take 15 minutes to fully crisp up. If they are still soft at that point, the batter might be too wet, or it was not cooked long enough. To resolve this, add a little more ground cereal or cook longer.
- If the cones are brittle and break easily, they were cooked a little too long, or the batter is too dry. To resolve this, reduce the cooking time first. If that doesn’t work, add milk.
- Drop a few chocolate chips into the bottom of the warm waffle cone to plug up the hole and prevent ice cream from leaking. The chocolate will melt from the heat of the cone.

Recommended supplies:
(Affiliate links. The products I recommend are either what I use, are on my wish list, or come highly rated.)
- I use this waffle maker. It works great for this recipe and comes with a cone roller and waffle bowl press.
- Small food processor: this has a 3.5 cup capacity work bowl with a pour spout. It and the locking blade are dishwasher safe.
- Ice cream scoop—to fill your cones with deliciousness. This large scoop is ergonomic and comfortable for both left and right hands. It has an innovative design and an easy-release trigger.
- Small wire whisk—this set contains a 5.5″ and a 7″ inch whisks. They are rustproof and safe for nonstick surfaces.
- Small spatula—these silicone spatulas come in a set of four. They are ideal for nonslip surfaces.
- Cooling rack—to rest the cones on while they cool and harden. This heavy-duty stainless steel cooling rack fits a quart-size sheet pan.
You Might Also Like:
 No Churn Black Raspberry Coconut Ice Cream
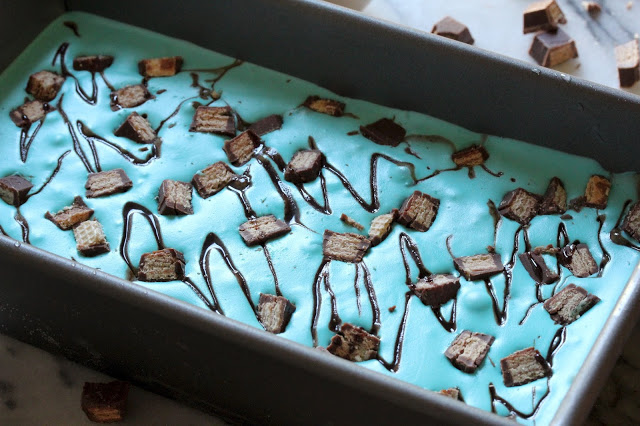 Blue Choc-A- Saurus Ice Cream
 No-Churn Mango Lime Swirl Ice Cream
 Ice Cream Sandwich Minnies

Make Your Own Cereal Waffle Cones
Description
Turn some of your favorite cereal brands into waffle cones!! Learn how to make waffle cones that taste like Froot Loops, Cocoa Krispies, or other cereals. Now you can enjoy homemade ice cream cones in a variety of flavors all summer!!
Ingredients
Instructions
- Place 2 1/2 to 3 cups of cereal in a food processor. Pulverize until cereal is flour or coarse cornmeal consistency. Measure 3/4 cups and set aside.
- In a small mixing bowl, combine butter and sugar. Whip with a hand whisk for 45 seconds. Add egg whites. Whip for 45 seconds.
- Add the 3/4 cup of pulverized cereal. Whisk until well blended. Add flour. Whisk to combine.
- Check for the consistency of the batter. To do so, scoop up a generous clump using a small spatula. Tip the spatula to allow the batter to fall freely. Parts of it should slowly slide off in a sheet or a sticky clump (image below).

- Heat your waffle cone maker according to the manufacturer’s instructions. Dollop 3 tablespoons of batter into the center. Press down on the lid as you close to flatten the batter. Cook for 1-3 minutes (different models may cook at different rates). Waffles are done when 3/4 of them have slightly changed shades, and/or the outer rim of the waffle appears crispy all around. My model cooks between 3 1/2 and 4 minutes with the heat cranked up at 75%.
- Use a non-metal spatula or a wooden popsicle stick to lift and remove the waffle. Slide it onto a flat surface. As soon as you can, without burning your fingers, wrap the waffle around the cone and press down with the ice cream mold for 20-30 seconds to secure the seam.
- Drop a few chocolate chips at the bottom of the cone. The warm cone will melt the chocolate and plug up the opening at the tip. (Alternatively, dip the tip of the cones into melted chocolate after all the cones are formed.)
- Transfer to a wire cooling rack, keeping the seam side down.
- Continue cooking and shaping the remaining batter.
- Makes 4 waffle cones, about 5 to 5 1/2 inches in diameter. Adjust the amount of batter you put in the waffle cone maker to make larger or smaller cones.
Notes:
- *Cereal tested: Froot Loops, Cocoa Krispies, Honey Nut Cheerios, Fruity Pebbles, Corn Pops, Frosted Flakes, Cinnamon Toast Crunch, and Cap’n Crunch. Frosted flakes don’t pulverize as finely as the others tested. They have a slightly porous matrix but are still crispy.
- This recipe has not been bested on cereal with add-ins like fruits and marshmallows. The add-ins may not pulverize as well and may cause sticking issues with the waffle iron. Crispiness of the cones may also be affected. Feel free to experiment on your own.
- **The batter will thicken if it sits out too long. If the waffle cones come out too thick, add 1 teaspoon of milk at a time. Adding too much milk will reduce the crispiness of the cones. I caution against adding more than 2 teaspoons.
- If the waffle cone seems a little soft, let it sit for 15 minutes to crisp up. If it’s still soft, the batter might be too wet, or it was not cooked long enough. To resolve this, add a little more ground cereal or cook longer.
- If the hot waffle is too brittle to shape, it might be overcooked, or the batter is too dry. Try reducing cooking time. If it does not work, add a little milk.
- Greasing the waffle cone maker is not necessary unless you have sticking issues.
Disclosure: This site contains paid advertising and affiliate links. In Good Flavor is a participant in the Amazon Services LLC Associates Program, an affiliate advertising program designed to provide a means for sites to earn advertising fees by advertising and linking to Amazon.com.


What a great idea! And they’re so pretty.
Thank you Mimi!