 In Good Flavor
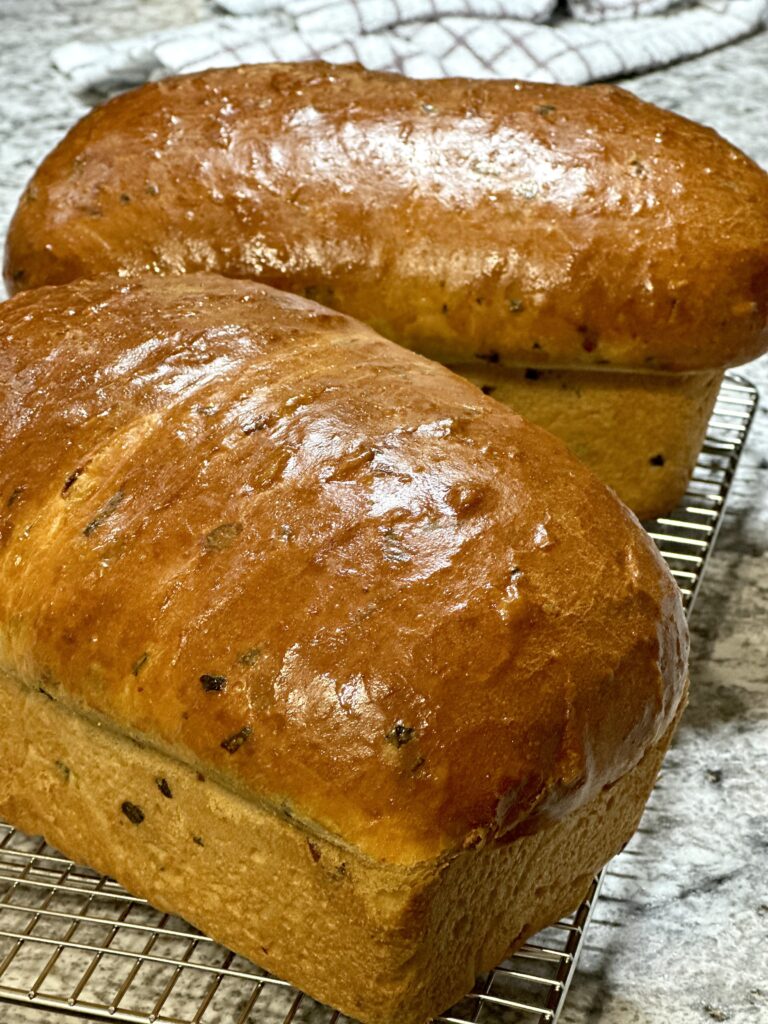
Homemade Scallion Garlic Bread is tender and buttery. It makes the best grilled cheese sandwiches too! This yeast bread is absolutely worth the effort. You will want to make it every week!!
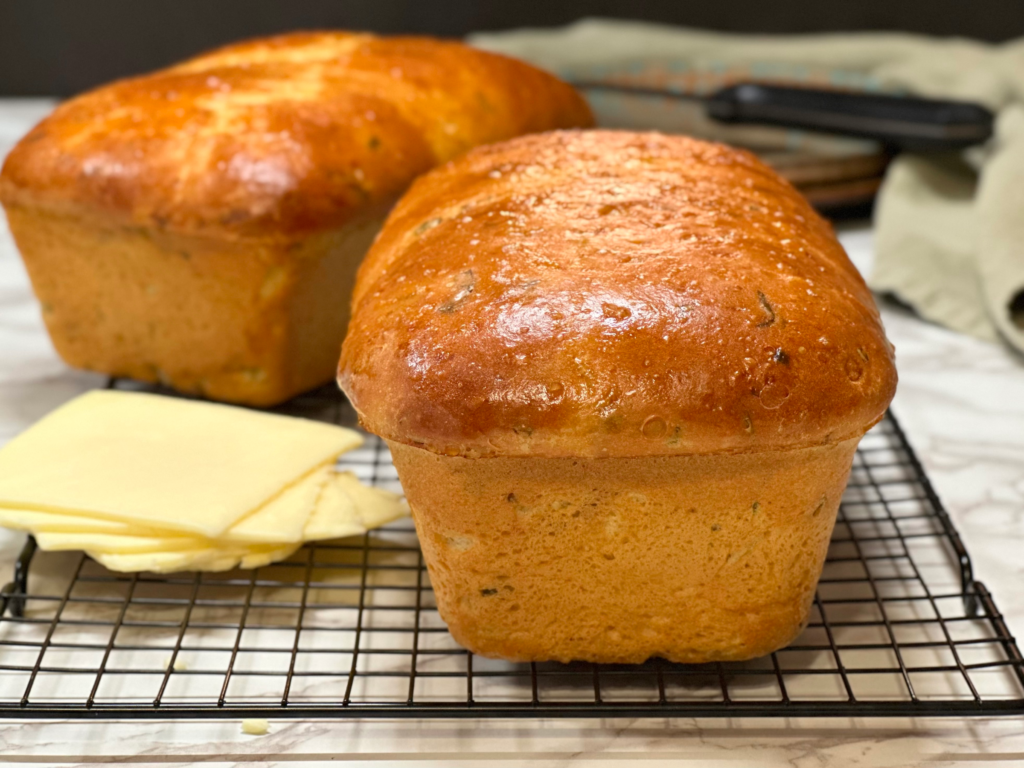
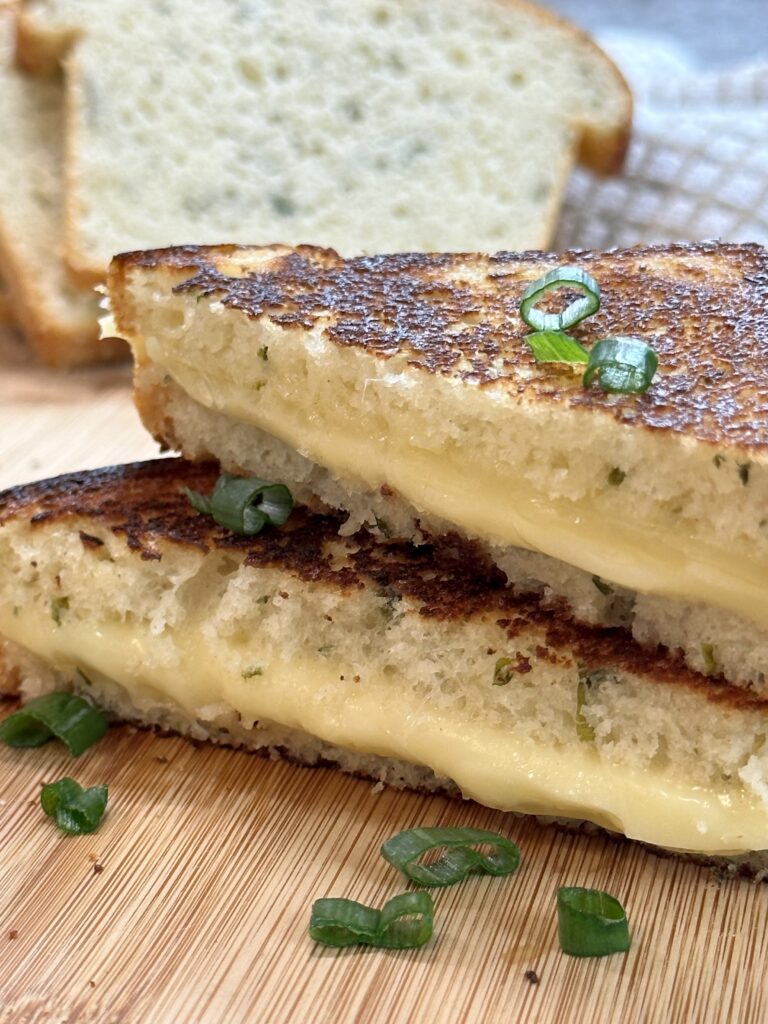
Next to my Portuguese Sweet Bread, this is my favorite bread to make. It is amazing on its own, slathered with butter, or toasted with cream cheese. But my favorite is to make grilled cheese sandwiches. The bread grills beautifully, so nice and golden brown and crispy. I love it with cheddar, American, or a combo of both. Oh, and it’s SO GOOD with horseradish cheddar cheese!!!
Experiment with your own favorite combo. The scallion-y, garlicky bread elevates a simple grilled cheese sandwich and brings it to the next level. Honestly guys, this bread makes an upscale restaurant style grilled cheese sandwich!!
Why make bread from scratch?
If you are hesitant about working with yeast bread, I won’t lie, there is a little learning curve. But if you remember some basic rules and give it a couple of tries, you will be highly rewarded. Yeast bread making is a skill that will always continues to treat you well.
When possible, I like to half the recipe whenever I’m trying something new to reduce waste if it doesn’t turn out right. This recipe makes 2 loaves but can easily be halved. Once you get the hang of making yeast bread, you can have so much fun making your own variations simply by using different seasonings and add-ins.
These are the benefits of making bread from scratch:
- You get to control what goes into it and the quality of ingredients.
- You can control the amount of salt and sugar to suit your taste.
- Making your own allows you to create variations that might not be available at the store by simply changing the seasoning and add-ins.
- Cost for loaf is more budget-friendly than store bought.
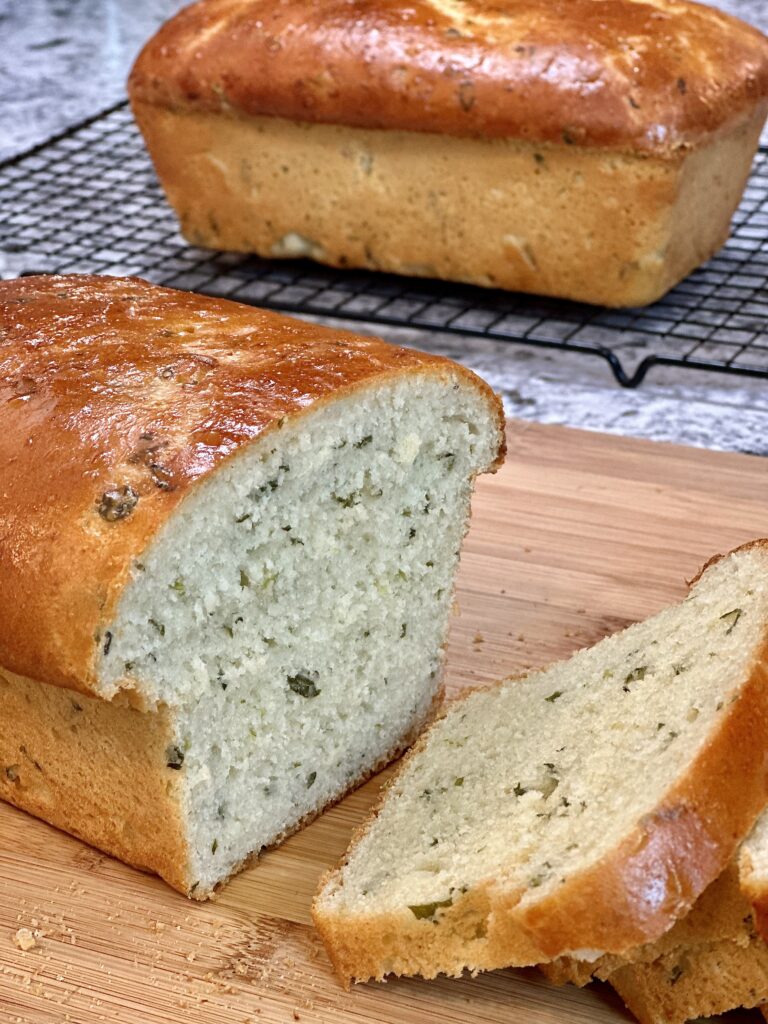
This Scallion Garlic Bread is an adaptation of Baker Bettie’s Country White Sandwich Bread. I added grated fresh garlic and chopped scallion to the recipe to make it my own. The result is something that tastes completely different from the original but with the same great airiness, texture, and chew.
Ingredients needed for this recipe:
- Flour—bread flour provides the best structure, tenderness and chew because of the high protein content. All-purpose flour contains less protein but can be used as an alternative.
- Yeast—active dry yeast or rapid rise instant yeast will work. I prefer to use rapid rise because it requires about 50% less time to rise.
- Milk—provides moisture, tenderness, and richness. Whole or reduced fat is fine.
- Water—used for yeast fermentation, gluten development, and helps give the dough structure.
- Butter—for richness and tenderness.
- Sugar—to add sweetness to the bread and acts as food for the yeast during the yeast proofing process.
- Table salt—needed for flavor. Without salt, the bread tastes flat.
- Garlic—freshly grated garlic to add amazing flavor.
- Scallion—for oniony flavor and specs of color.
Recipe highlights:
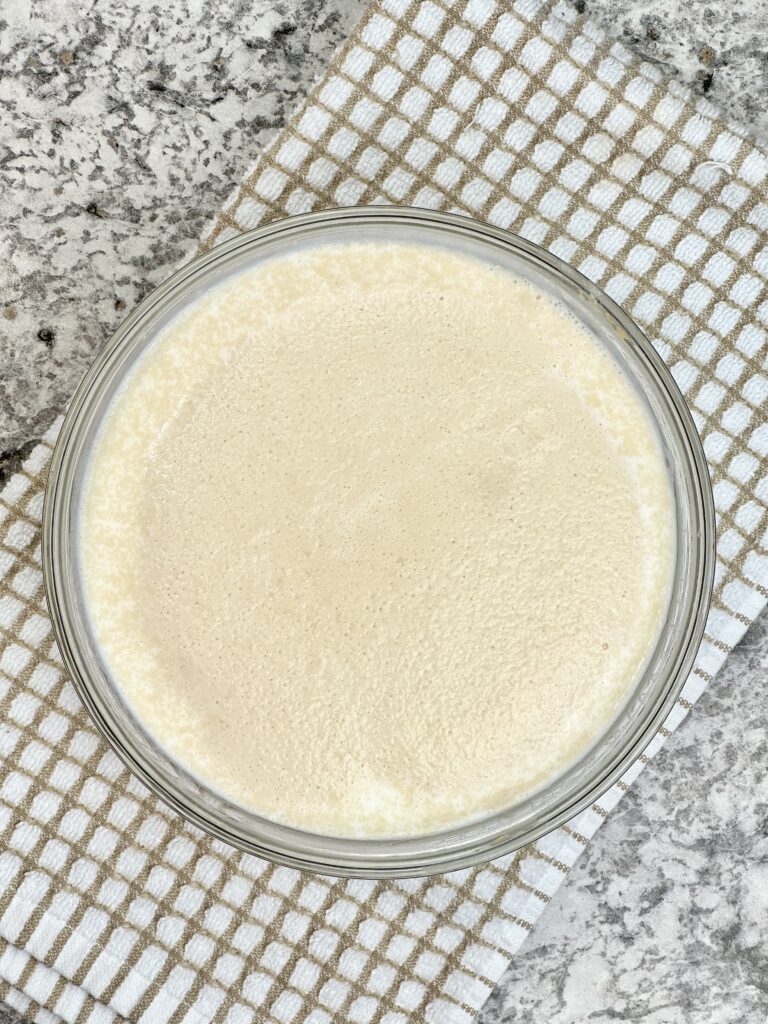
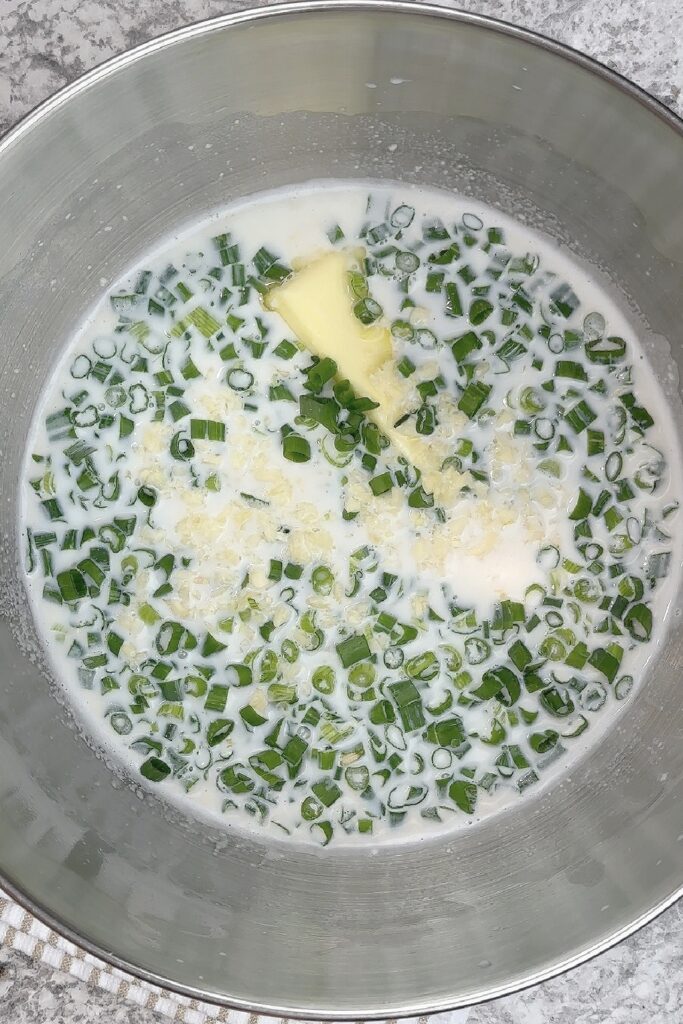
- Proof yeast for 10 minutes in warm milk, water, and 1 teaspoon sugar.
- Pour into stand mixer bowl or mixing bowl if kneading by hand. Add butter, sugar, salt, garlic, and scallion. Stir with a wooden spoon.
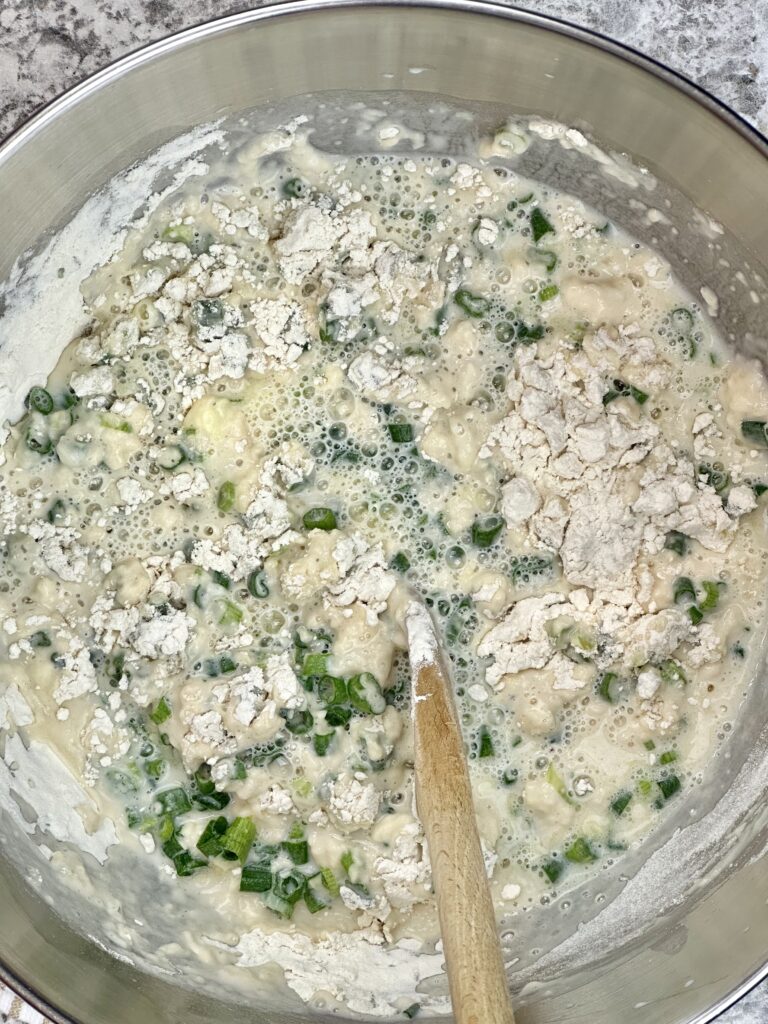
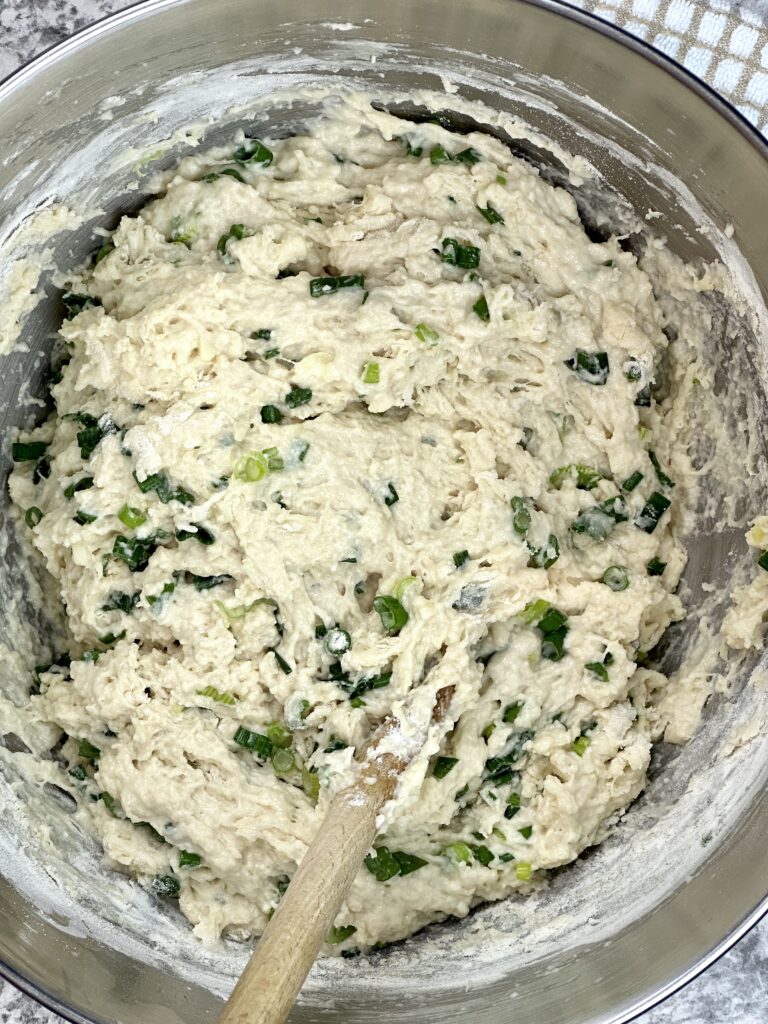
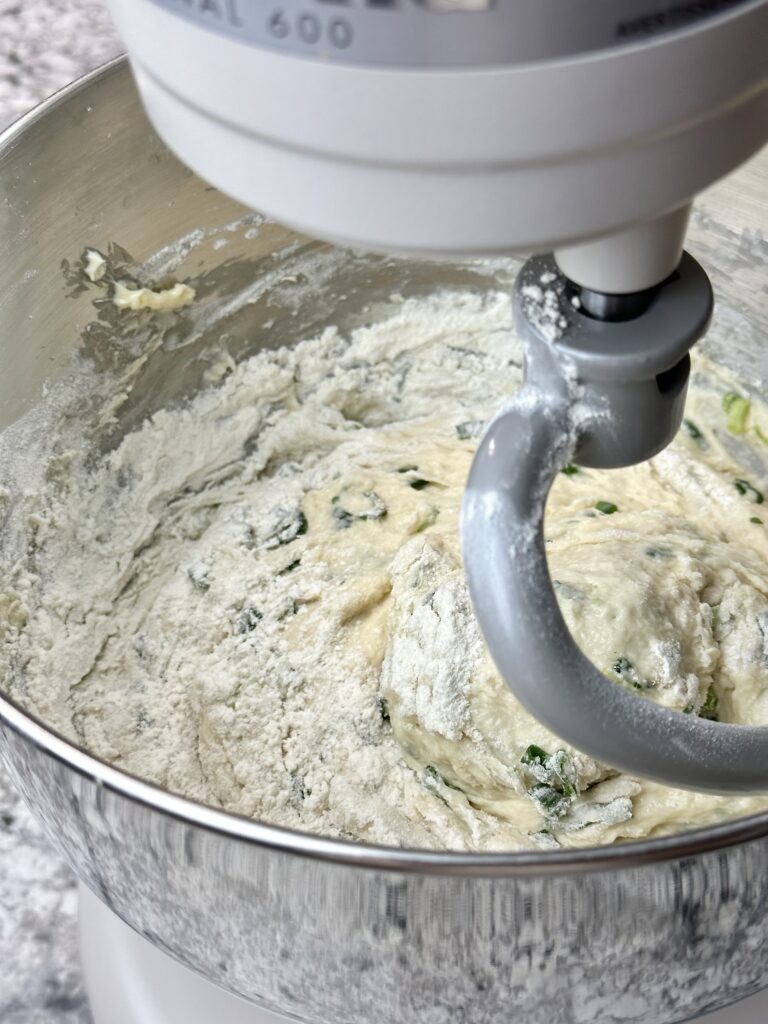
- Add 3 cups flour. Stir to partially combine. Add 3 1/4 cups flour. Stir thoroughly until the mixture becomes a shaggy dough.
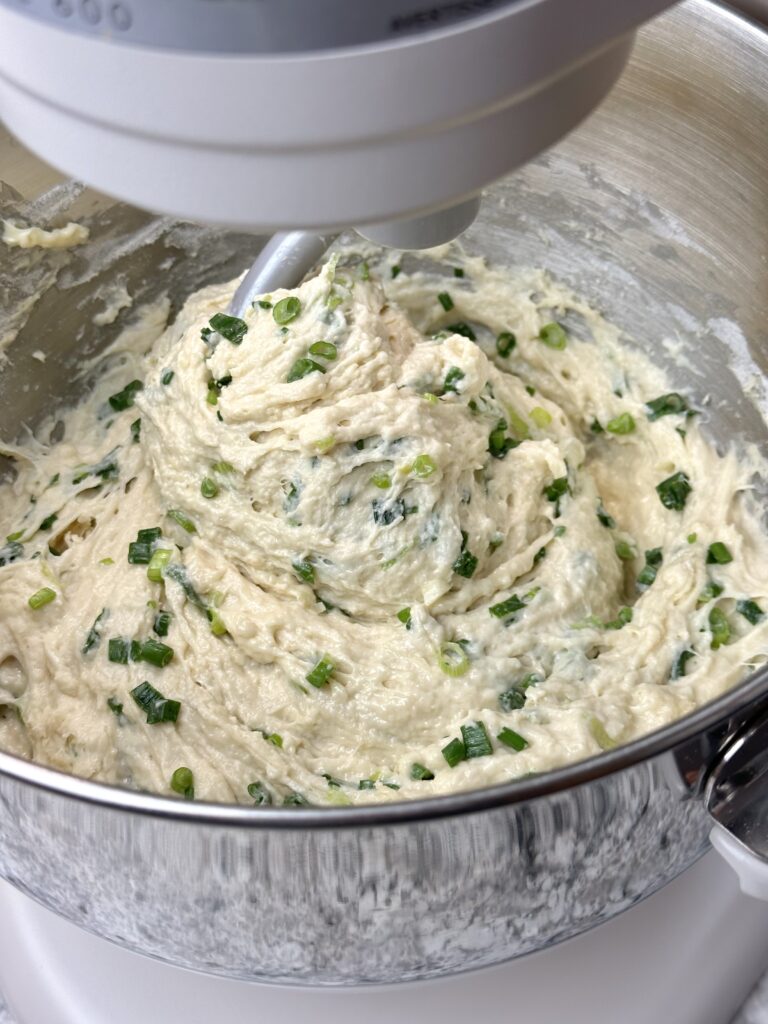
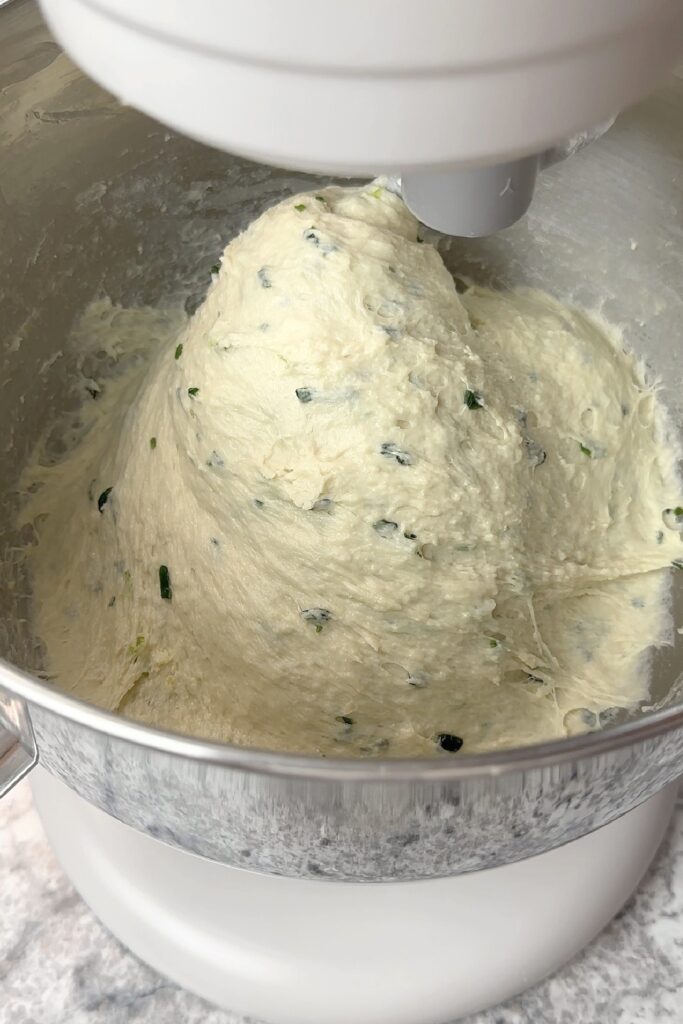
- If kneading by machine, place bowl on a stand mixer fitted with a dough hook. Knead for 1 minute. If the dough does not pull away from the bowl, add 2 tablespoons of flour at a time (up to one cup total) until the dough clears the side of the bowl. Wait about 30 seconds in between additions. Total kneading time is roughly 6-8 minutes.
- If you are kneading by hand, turn onto a floured surface. Knead, adding 2 tablespoons of flour at a time (up to one cup total) until the dough feels soft and sticky but manageable. Knead for roughly 8-10 minutes or until dough becomes elastic, smooth, and slightly tacky.
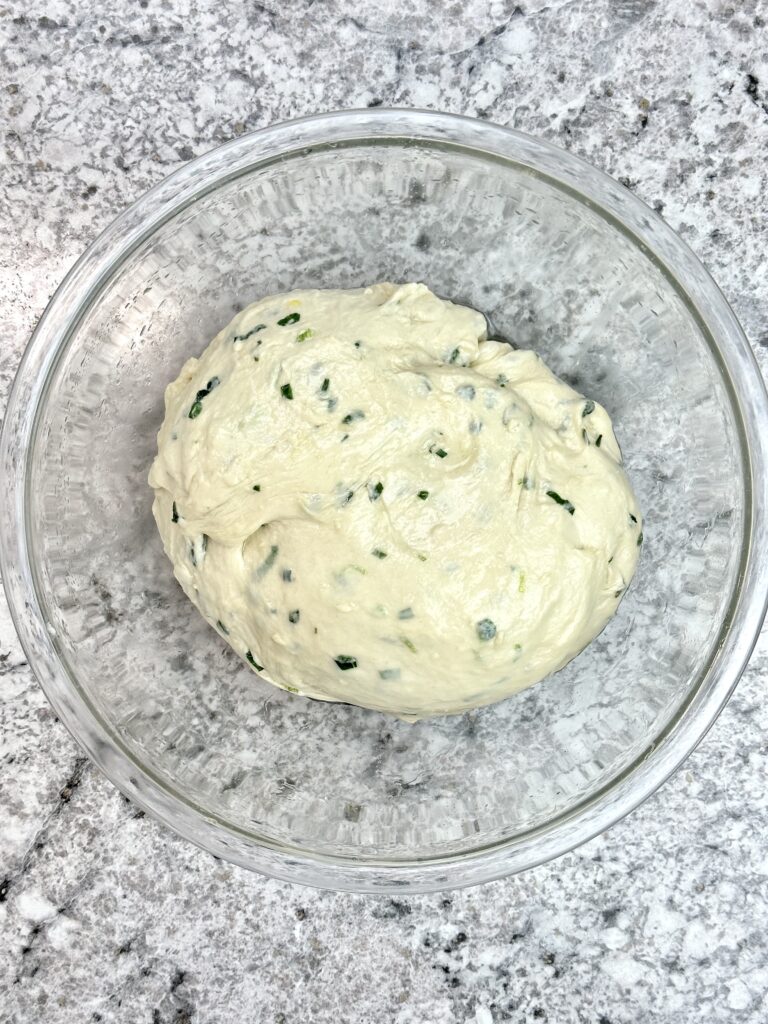
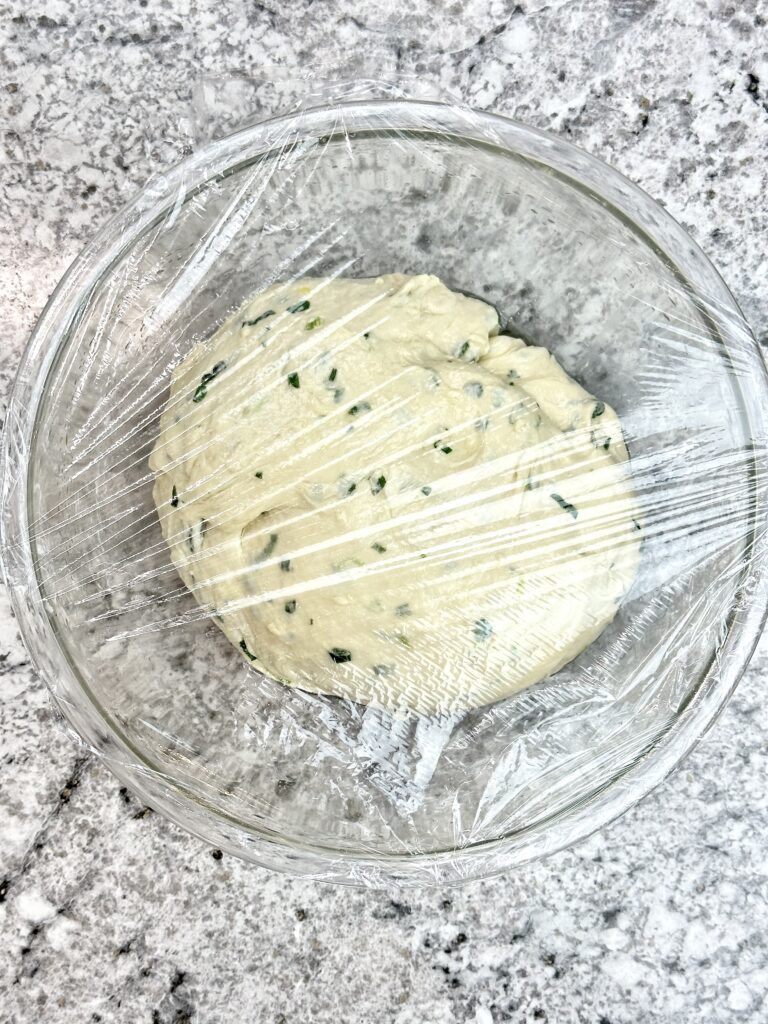
- Turn dough into a large generously greased bowl. Swirl dough around to coat with oil. Cover and let rise at room temperature —1 hour for rapid rise yeast, 2 hours for active dry yeast.
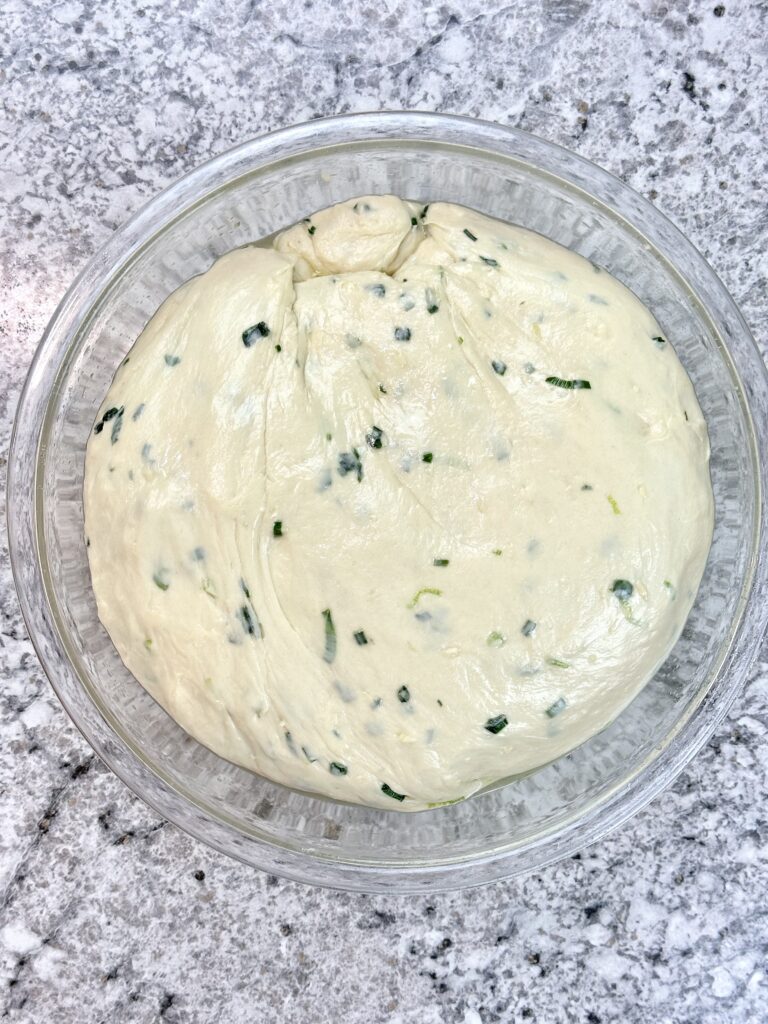
- Dough will double in size. Gently punch down dough to release air bubbles. Turn onto a work surface. Divide into 2 equal portions.

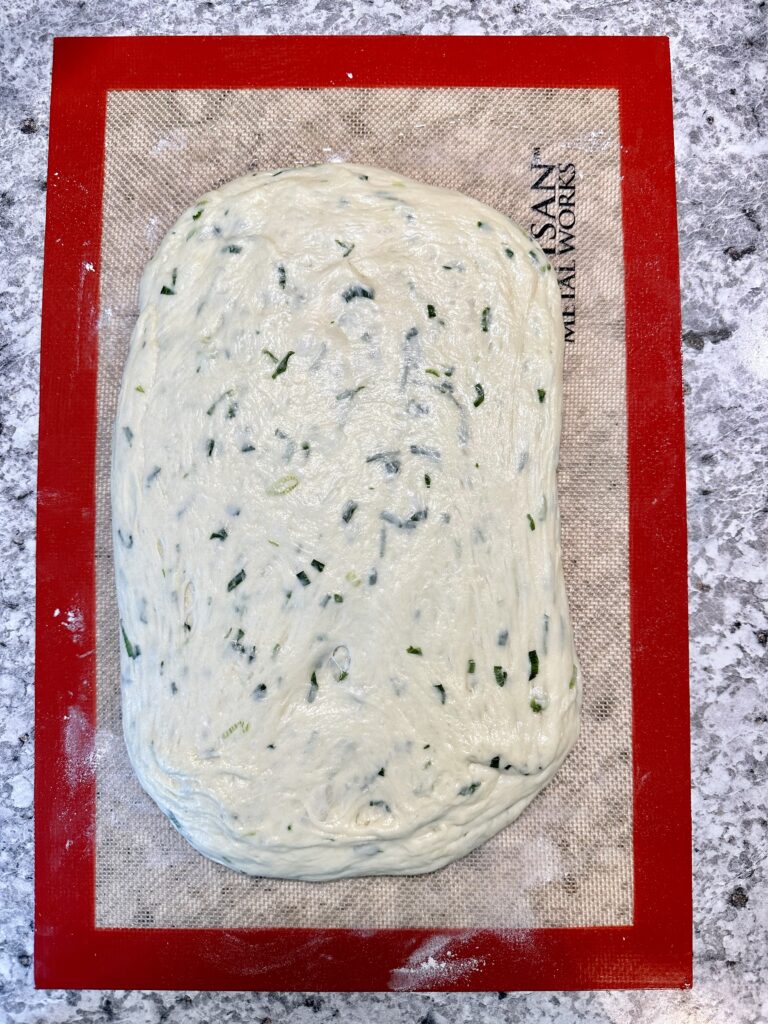
- Press on one of the dough halves to form an 8-inch wide rectangle. Shape according to instructions of the recipe card or this Pinterest Pin. Shape the second dough half.
- Place the dough, seam side down greased loaf pans. Grease a sheet of plastic wrap and cover loaves loosely, greased side down. Let the dough proof at room temperature for a second rise.
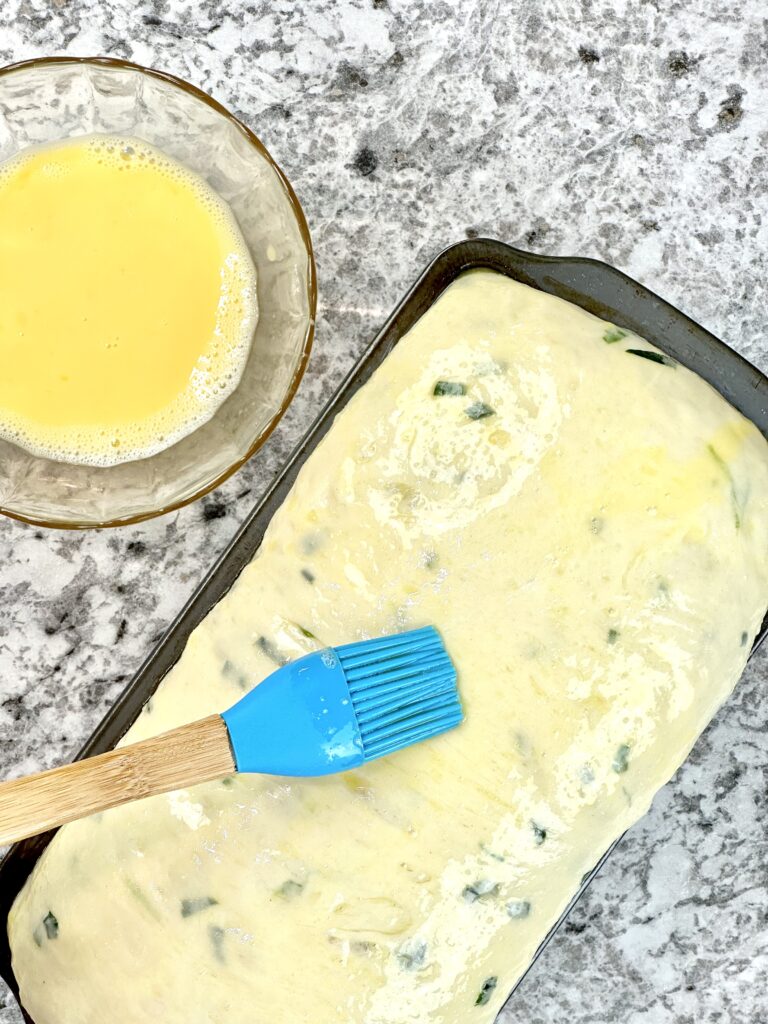
- Brush the tops with an egg wash.
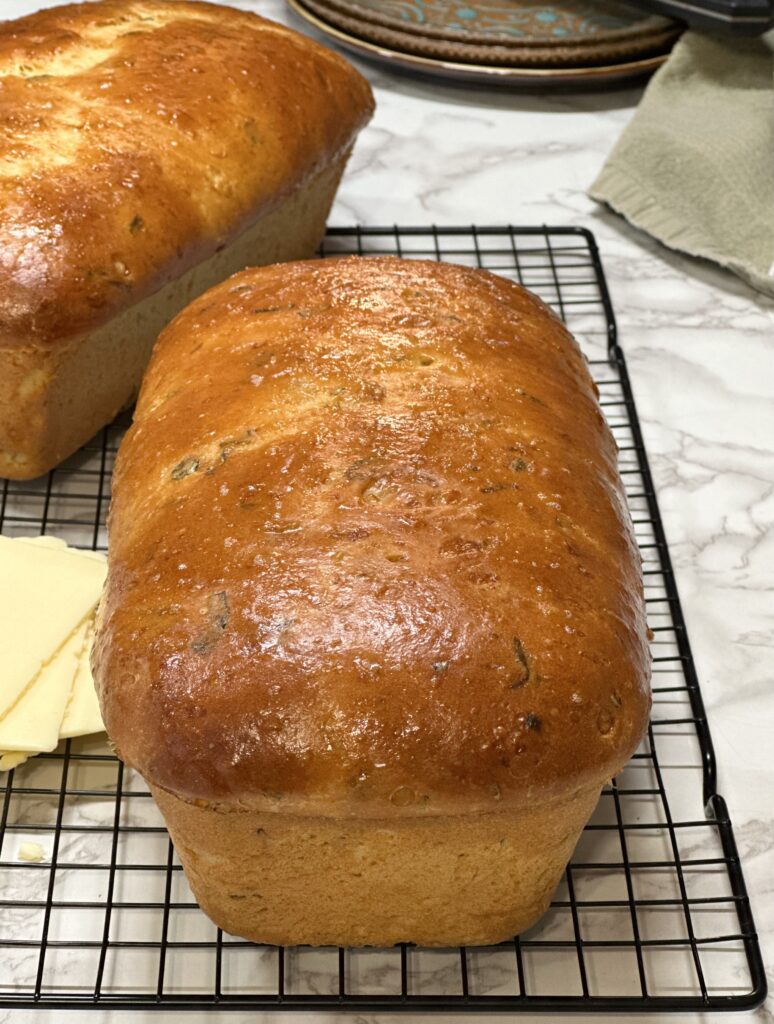
- Bake in a preheated 350° F oven for 35-45 minutes. Allow to cool 5 minutes before unmolding. Cool completely on a wire rack before slicing.
- Refer to recipe card below for detailed instructions.

View the how-to video or save for later with this Pinterest Pin.
What type of flour is best?
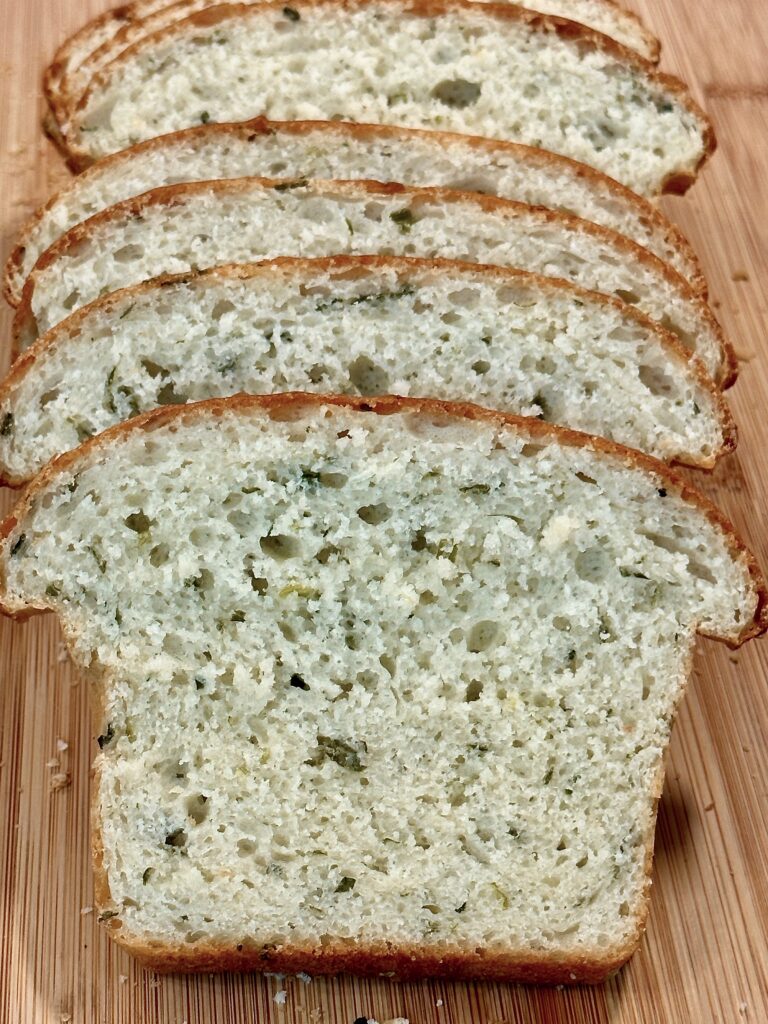
Bread flour is best. It has a high protein content compared to all-purpose flour, which means it produces more gluten. The gluten strands are more elastic, longer, and stable than AP flour strands. These properties allow the dough to trap and hold in greater amount of air bubbles. As a result, bread flour produces fluffier bread with a chewy texture.
Having said that, all-purpose flour can be used, of course. The bread will be delicious, but it might not be as airy and chewy are ones made with bread flour.
How to tell if the dough is kneaded enough?
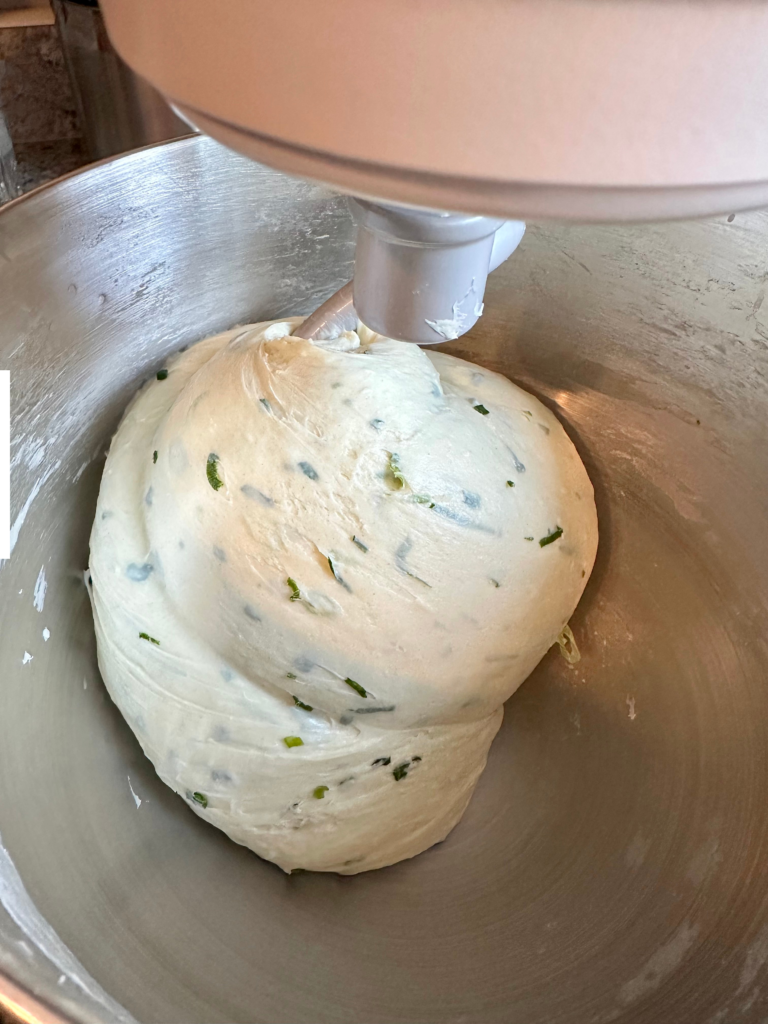
You can tell if dough has been properly kneaded when it is elastic, smooth but slightly tacky. There are also other indicators that the dough has been kneaded sufficiently. Below are two test methods:
- The poke test—give the dough a poke with your finger. If it springs quickly, it has been properly kneaded. If the indentation remains, the dough requires more kneading.
- The windowpane test—pull off a golf-ball size chunk of dough. Stretch it out as thinly as you can. If it stretches paper thin without tearing and allows light to pass through, it is done kneading.
Under kneaded dough will be loose, floppy, and won’t hold its shape. It will also leave an indentation instead of springing back when poked. Continue to knead and recheck.
Over kneaded dough will be stiff, tough, and resists reshaping. If you knead by hand, it’s really hard to over knead. You need to pay closer attention to this when using a stand mixer.
Is it necessary to shape the dough prior to placing in the bread pan?
This bread requires two rise periods: one after kneading and one before the dough goes into the loaf pan. It is necessary to shape the dough before it goes into the pan for the second rise. The purpose of shaping the dough is to create surface tension in order for it to maintain the best rise during baking as well as to produce a uniform crumb.
I suggest using the shaping method demonstrated in the Recipe Highlights above, but if you would like a simpler alternative, use the technique below.
- Pat the dough into an 8-inch wide rectangle. Starting at one of the 8-inch sides, tightly roll the dough into a log. It’s important to keep your roll tight to create surface tension. Pinch the seam tight and place into the loaf pan, seam-side-down.
How to store:
Store bread in a plastic bag at room temperature for up to 4 days. To refrigerate, place in a sealed plastic bag for up to one week. The bread will take on a firmer consistency once refrigerated. To restore tenderness, heat up slices in the microwave for a few seconds before eating.
Can you freeze baked bread?
Yes, you can certainly freeze baked bread. This bread freezes great! To freeze: cool the bread completely, then wrap in plastic wrap, followed by aluminum foil. Freeze for up to 3 months. Defrost in the refrigerator or at room temperature when ready to use.
Can you freeze unbaked dough?
Because some of the yeast die off when frozen, freezing unbaked dough is not recommended. The quality of the bread will not be as good as the one that is baked the same day it was mixed. Also, previously frozen dough will not rise as well.
Additionally, the gluten strands of lower protein content flour, like all-purpose flour, break down and weaken when frozen. This can result in more crumbly and dense bread. The best bet is to freeze baked bread.

Helpful tips:
- Check the expiration date of the yeast. If there is any doubt regarding the viability of the yeast, err on the cautious side and get new yeast.
- Rapid rise instant yeast can withstand higher temperature during proofing than active dry yeast. I typically use 120° F liquid temperature for the rapid rise instant yeast and 110° F for active dry yeast.
- Measure liquid and flour properly. Incorrect measuring is often the culprit for dough that is too dry or wet.
- To measure flour: Fluff flour with a fork. Spoon the flour into the measuring cup instead of dipping the cup into the flour. Run a butter knife across the top of the measuring cup to level off the flour.
- To measure liquid: Use the clear liquid measuring cup, not the ones for solids. Set the measuring cup on a flat and level surface. Check the liquid measurement at eye level, and make sure the bottom of the meniscus sits right on top of the measuring line.
Recommended supplies:
(Affiliate links. The products I recommend are either what I use, are on my wish list, or come highly rated.)
- Bench/dough scraper for scraping dough out of the bowl.
- Silicone pastry mat is non stick and helps prevents the dough from sticking when kneading and shaping.
- I have this KitchenAid stand mixer which is great for kneading dough. It’s powerful and has a 6-quart capacity bowl. Using a stand mixer is optional. You can just knead by hand.
- Two 8.4 x 4.4-inch loaf pans. These are nonstick carbon steel loaf pans with easy grip handles.
- Microplane for grating the garlic.
YOU MIGHT ALSO LIKE THESE RECIPES
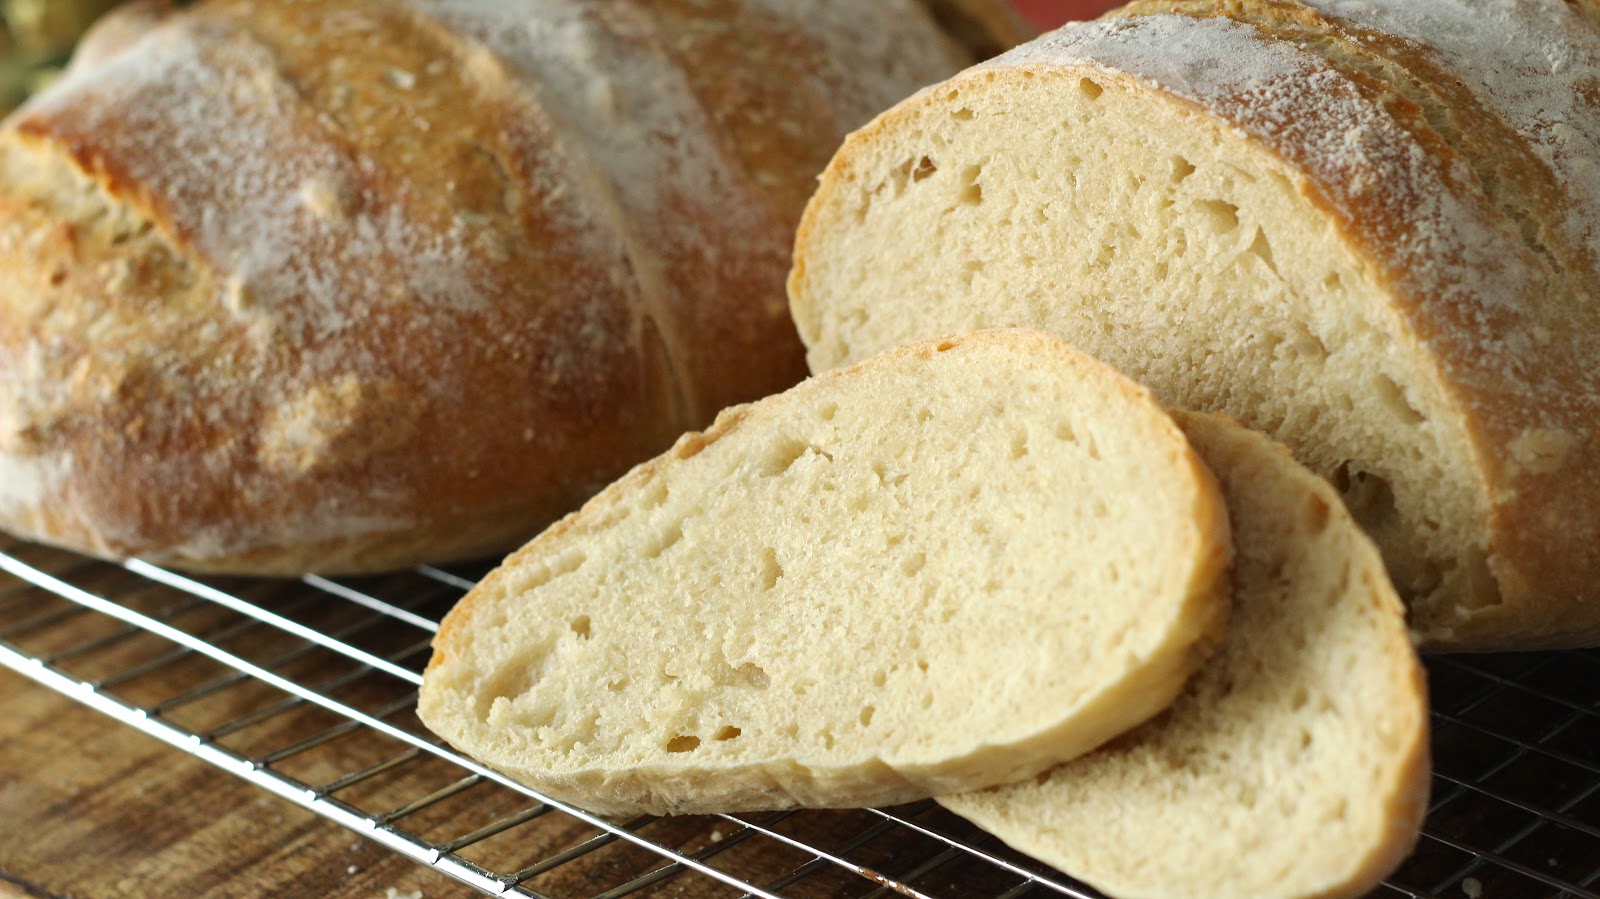 No-Knead Artisan Bread
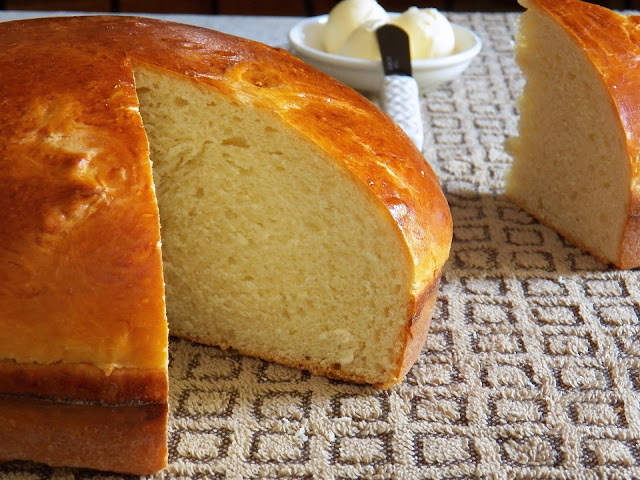 Portuguese Sweet Bread
 Soft Homemade Flour Tortillas
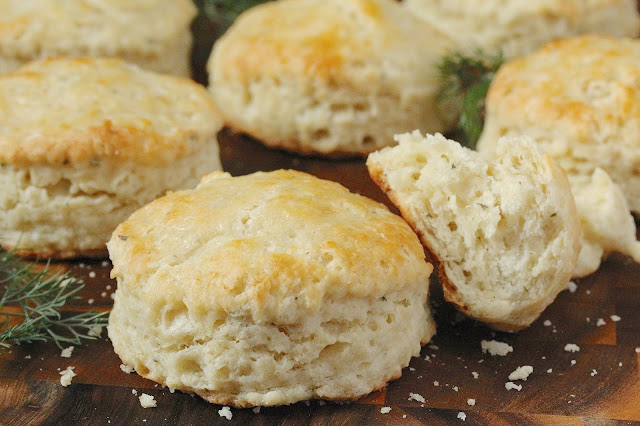 Garlic and Herbs Boursin Biscuits

Scallion Garlic Bread
Description
Homemade Scallion Garlic Bread is tender and buttery. It makes the best grilled cheese sandwiches too! This yeast bread is absolutely worth the effort. You will want to make it every week!!
Ingredients
Instructions
- First proof the yeast: Combine water, milk, and 1 teaspoon sugar (use 1/2 teaspoon for half recipe). Heat to 110° F for active dry yeast and 120° F if using rapid rise yeast. Stir in all the yeast. Let sit for 10 minutes. Yeast should become a foamy. If it does not foam, it is dead and you need to start over.
- Transfer the yeast mixture to the stand mixer bowl if kneading by machine and a regular mixing bowl if kneading by hand. Add butter, sugar, salt, and 6 1/2 cups of flour in increments (3 1/4 cups for a half recipe). Stir with a wooden spoon or by hand until the mixture becomes a shaggy dough. Then it’s time to knead.
- Kneading by stand mixer: Place the bowl onto the stand mixer fitted with a dough hook attachment. Start with the mixer on low. After 1 minute of mixing, if the dough does not start to clear the side of the bowl, add a couple tablespoons of flour at a time until it starts to pull away from the sides. Allow the flour to incorporate before adding more. You should need to add the max of one cup. My stand mixer requires dough to be kneaded on low (speed 2). If your stand mixer does not not have the low speed restriction, increase to medium a this point. Knead for 6 to 8 minutes total, or until the dough becomes smooth, elastic, and springs back when poked. If poking leaves a indentation in the dough, it needs more kneading. (See Note ** below.)
- Kneading by hand: Turn the dough onto a floured work surface. Lightly flour the top of the dough. Gather into an oval mass with the pointy ends at 12 o’clock and 6 o’clock. Fold the 12 o’clock end over to the 6 o’clock end (using a plastic bench scraper would help if the dough is overly sticky). Using the heel of your hand, press on the lower end of the dough with a downward and forward motion. Turn the dough a quarter turn. Fold the 12 o’clock end over to the 6 o’clock end again. Then repeat pressing downward and away from you. Continue to kneading in this manner for 8-10 minutes. As you continue to knead, add a small amount of flour, as needed, if the dough feels too wet and sticky. The max amount you might need to add is 1 cup total. The dough is properly kneaded when it becomes smooth, elastic, and springs back when poked. If poking leaves a indentation in the dough, it needs more kneading. (See Note ** below.)
- Transfer the dough into a generously large greased bowl. Turn the dough around to coat with oil. Cover with a damp towel or plastic wrap. Allow to rest and double in size at room temperature for approximately 1 hour if using rapid rise yeast and 2 hours for active dry yeast.
- Gently press punch down dough to release some air. Divide into 2 equal pieces. Working with one piece at a time, press gently to to form a rough rectangle with the short side no wider than 8-inches.
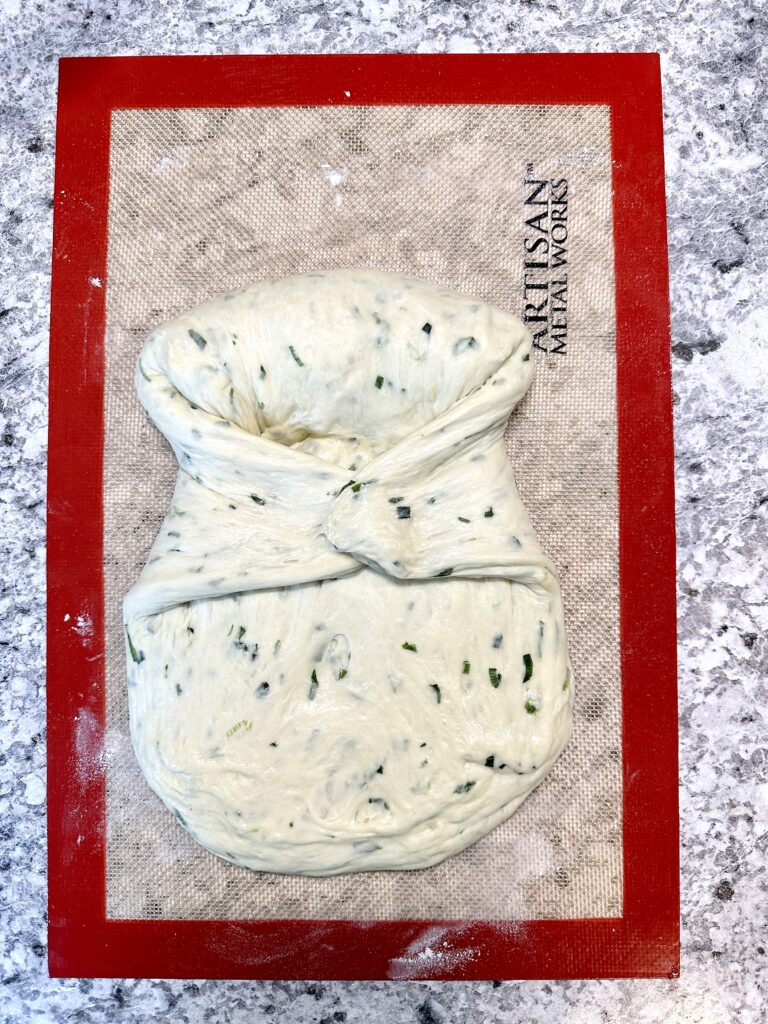
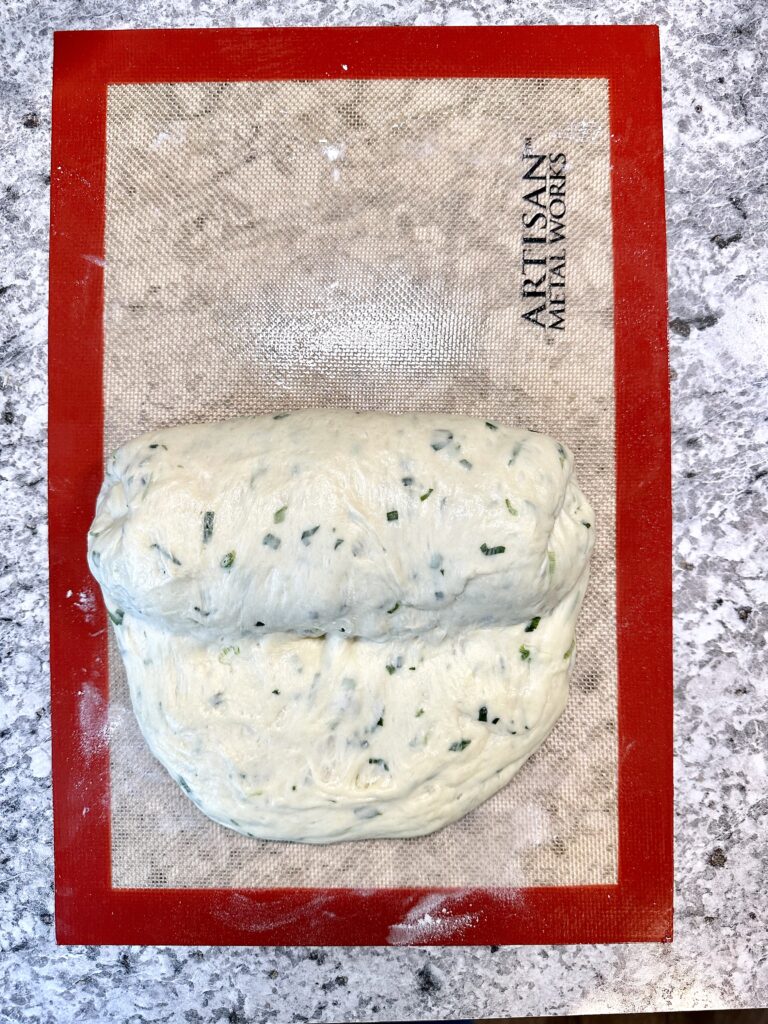
- Stretch out the corners of one of the short sides to form flaps. Fold them back towards center so that the top edge of the flaps meet vertically at the center line to form a point at the top of the rectangle. The outline of the dough should resemble a shape of a house. Use the heel of your hand to press down the seam to seal.
- Fold the pointed tip over the seam and press to seal the new seam.
- Repeat stretching the corners out, folding, sealing (steps 7-8) two more times. You should still have some unrolled dough at this point.
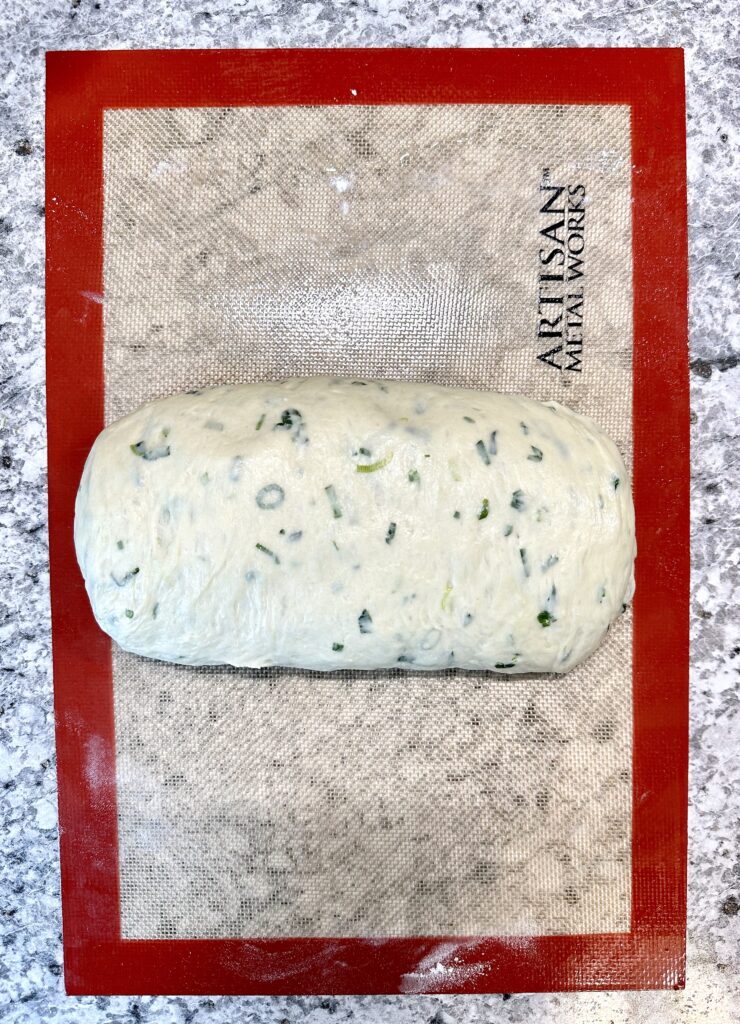
- Roll the dough log-style onto itself. When you are within an inch or so of the edge, cup your hand over the log while pressing into the bottom edge of the log roll with the heel of your hand to seal the seam. Then roll the log to the edge of the dough.
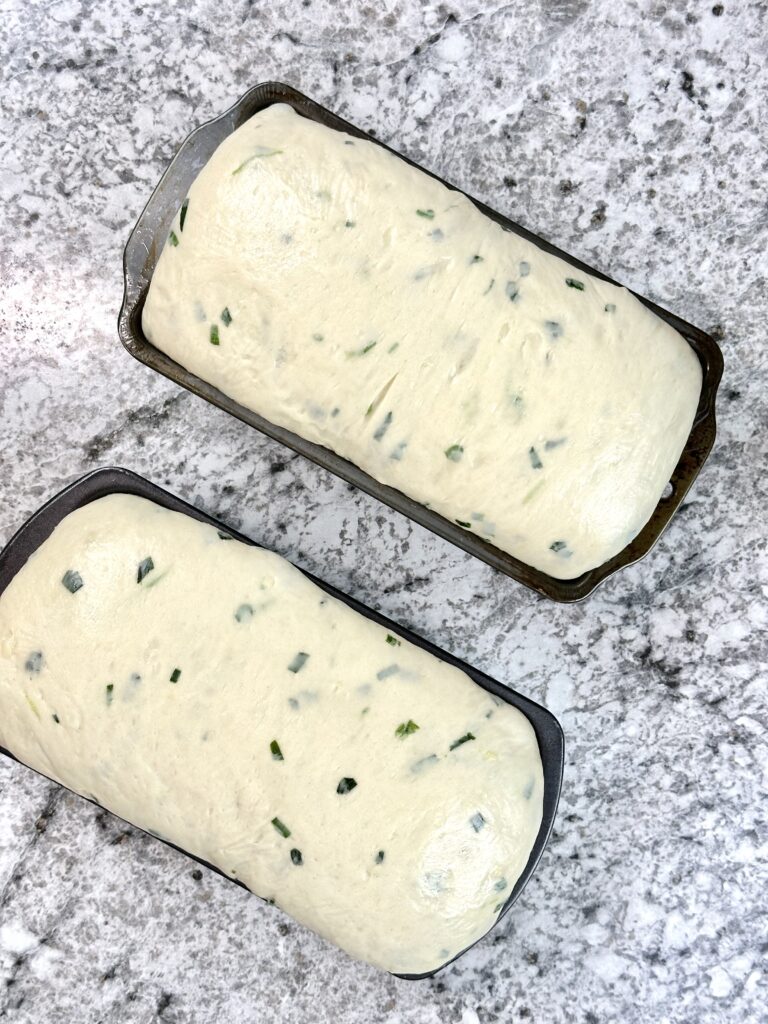
- Grease the bottom and sides of two 8.5 x 4.5 x 2.5-inch loaf pans. Place the dough, seam side down in the loaves. Press down gently with your hand to distribute the dough to fill the pan. Cover loosely with a lightly greased plastic wrap. Shape the other half of the dough.
- See Note*** below for shaping alternative.
- Proof dough at room temperature until the dough doubles in size and rises about 1-inch over the pans. This takes about 1 hour if using rapid rise yeast and 2 hours if using active dry yeast.
- Preheat the oven to 350° F 10 minutes before the dough is ready to bake.
- Whisk egg and water in a small bowl. Brush egg wash onto the top of the loaves. Bake on the center rack for 35-45 minutes. Mine are usually done in 35 minutes. The internal temperature should be 190°-200° F.
- Allow to cool in loaf pans for 5 minutes. Transfer to a cooling rack. Brush the top with butter to keep crust soft (optional). Allow to cool for at least one hour before slicing (30 minutes is a bare minimum).
- Makes 2 loaves, about 15 slices each.
Prepping dough:
Fermentation (1st rise)
To shape dough:
Proofing (2nd rise):
Baking:
Notes
- This recipe is an adaptation of Baker Bettie’s Country White Sandwich Bread.
- Recipe can be halved to produce just one loaf. Just decrease all the ingredients by half and use only 1/2 teaspoon of sugar when proofing the yeast.
- *All-purpose flour has less protein content than bread flour, therefore absorbs less liquid than bread flour. You might need to use 1 tablespoon more per cup of all-purpose flour than bread flour. For example: if you use 6 1/2 cups of bread flour for this recipe, you might need 3 1/4 tablespoons more if using all-purpose flour.
- ** In addition to the poke test, another indicator that the dough has been properly kneaded is the windowpane test: pull off a golf-ball size chunk of dough. Stretch it out as thinly as you can. If it stretches paper thin without tearing and allows light to pass through, it is done kneading.
- Over kneading dough is hard to do by hand, but it’s easier to do with a stand mixer. Over kneaded dough will be stiff, tough, and resists reshaping. I recommend checking for doneness early and frequently when using a stand mixer. Use the look and feel of the dough, the poke test, and window pane test as guidelines. Those queues are more accurate indicators of properly kneaded dough than the time spent on kneading.
- To fix a dry dough, add a teaspoon of water at a time until it starts to look smooth.
- Optional: To create a warm environment for the dough to rise in and to decrease the rise time about 25%, turn the oven to the lowest setting. Shut it off when the temp reaches 100° F. Place the covered bowl with the dough in the oven for the first and second rise. Remove the the bowl 10 minutes before the end of the second rise and allow the dough to finish proofing at room temperature. Preheat the oven for baking the bread. You want to have the oven ready as soon as the dough is ready to go in.
- ***I recommend using the shaping method demonstrated, but for or a simpler alternative, use the log rolling technique: Pat the dough into an 8-inch wide rectangle. Starting at one of the 8-inch sides, tightly roll the dough into a log. It’s important to keep your roll tight to create surface tension. Pinch the seam tight and place into the loaf pan, seam-side-down.
Disclosure: This site contains paid advertising and affiliate links. In Good Flavor is a participant in the Amazon Services LLC Associates Program, an affiliate advertising program designed to provide a means for sites to earn advertising fees by advertising and linking to Amazon.com.

Beautiful bread. I love that you added scallions!
Thank you Mimi. I love scallion!!
Lovely bread–and it does look good in the grilled cheese! I keep saying I’m going to make more bread this winter. Maybe this will get me started!
Thanks Inger! I think you should too! I really enjoy working with yeast dough. Plus, you can’t beat fresh bread straight out of the oven!