In Good Flavor
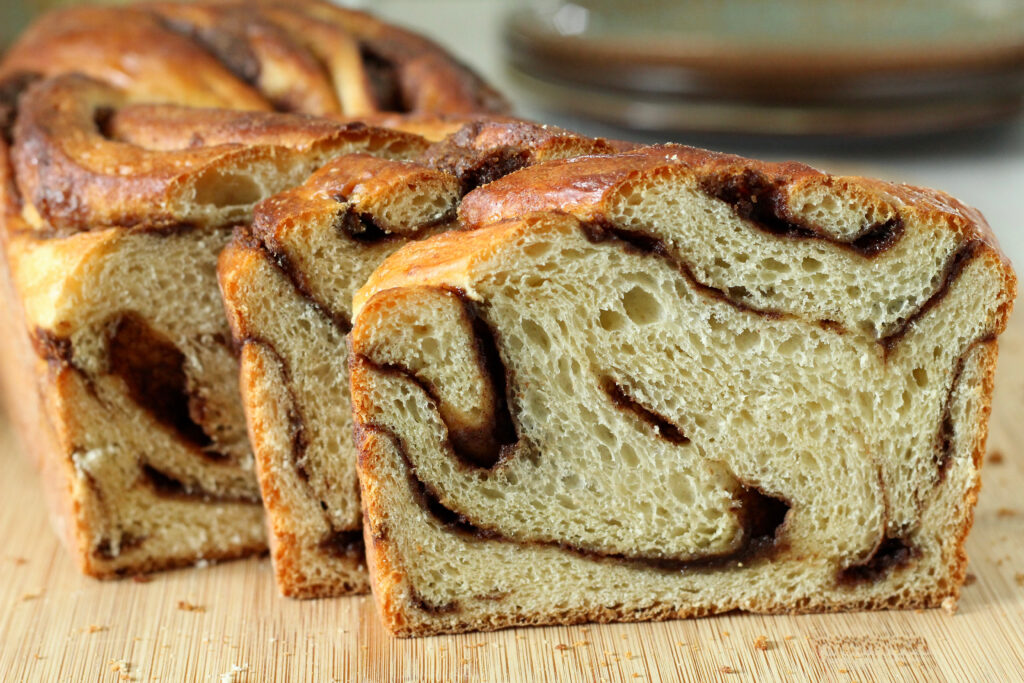
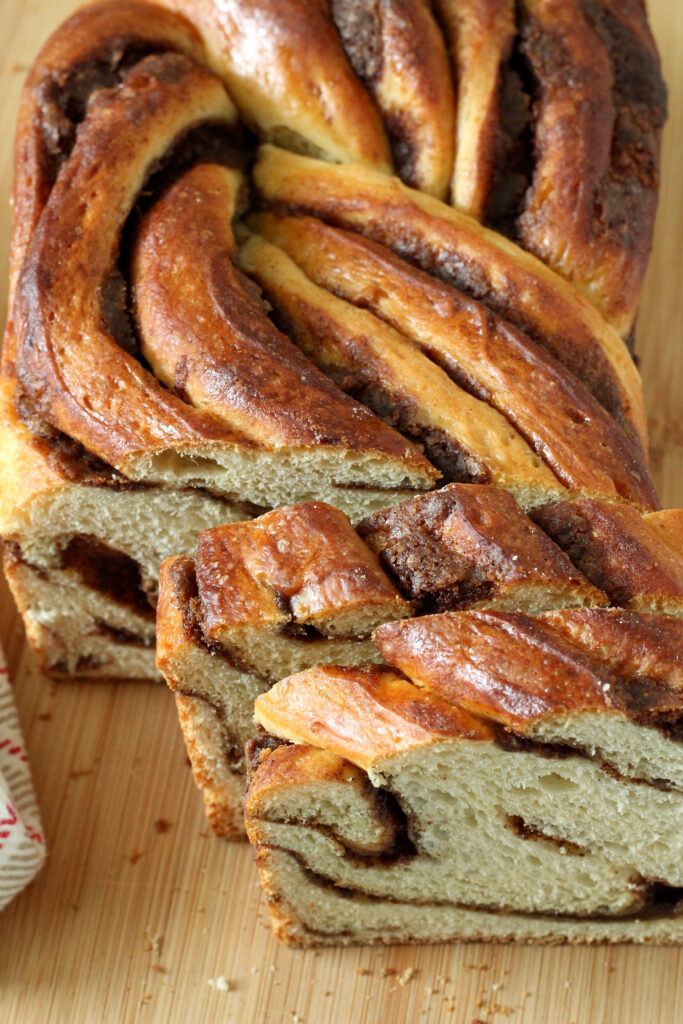
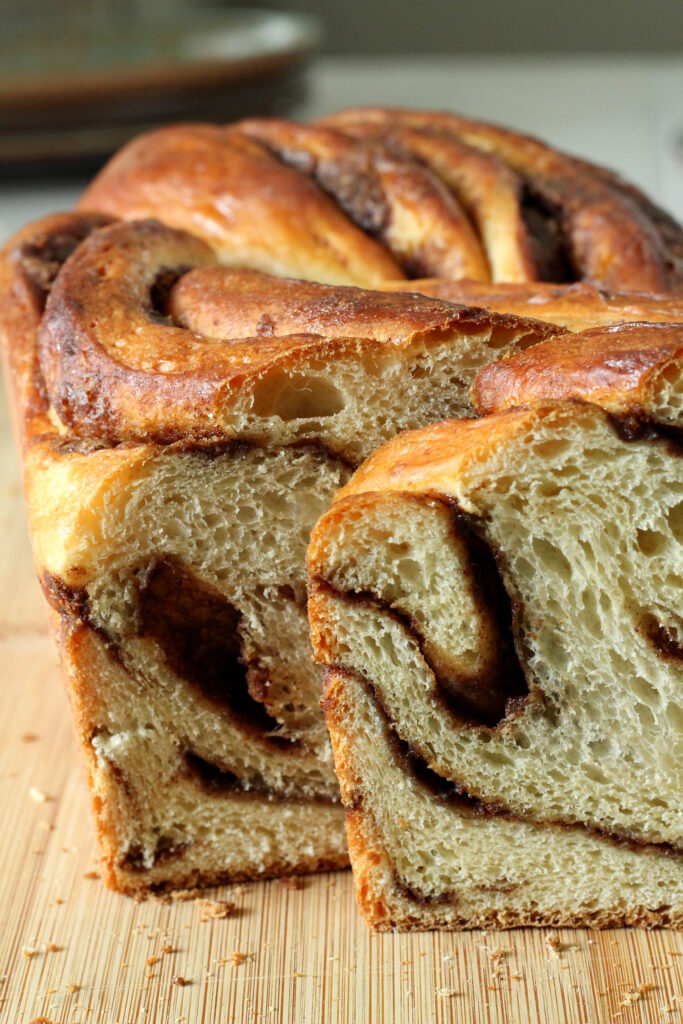
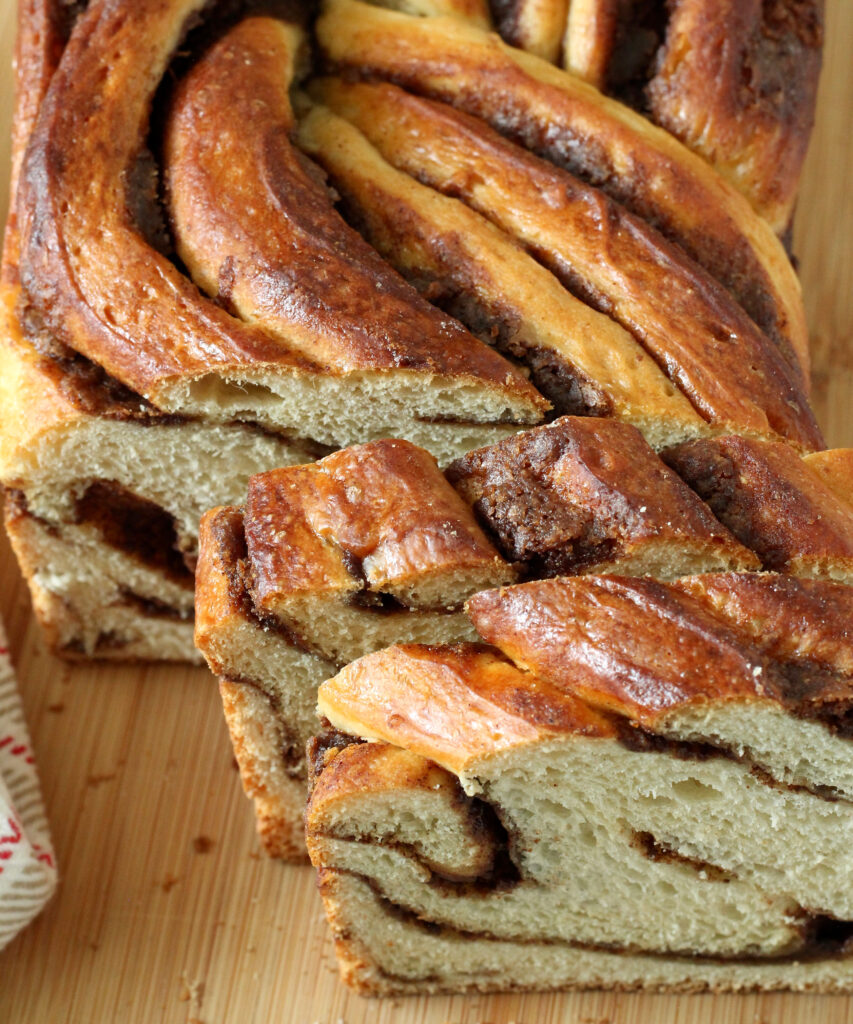
This Cinnamon Sugar Portuguese Sweet Bread has a soft, fluffy texture of traditional Massa Sovada—but with delicious swirls of cinnamon sugar. If you’re not already a bread lover, this loaf is guaranteed to win you over.
I’m delighted to say that Portuguese Sweet Bread has consistently been in the top three of the most popular recipes of all time on this site. It has a little sweetness and tender, fluffy crumbs. It’s delightful with a good pat of butter and even more so toasted. I enjoy it with a morning cup of coffee or just as a snack.
This delightful cinnamon sugar version takes the bread to a whole new level of deliciousness, making it even more irresistible! There is the flavor and texture of Portuguese sweet bread, but with ribbons of brown sugar and cinnamon throughout. And it’s gorgeous, twisted into a rope, similar to babka, with exposed cinnamon sugar on top!
Is it a yeast bread?
This is a yeast bread recipe, and it’s made easy by using a stand mixer to do the work for you. Even if you’re new to making yeast bread, you can learn how! Just follow a few basic rules and, with a little practice, you’ll master this made-from-scratch bread! It’s so worth the effort! My family REALLY loves me when I make it!!
Things to keep in mind for success:
- Measure the flour correctly: Packed flour results in excess flour in the recipe, which causes dry bread. To ensure accurate measurement, fluff the flour well with a fork. Then, use a spoon to scoop the flour into the measuring cup. Do not tap or tamp the flour down. To level, run the straight side of a butter knife lightly across the measuring cup.
- Bloom the yeast at the proper temperature: This bread recipe uses active dry yeast, which blooms (is activated) between 105° F and 115° F. If you’re not familiar with working with yeast, use an instant-read thermometer to ensure you have the correct temperature for the best results.
- Use fresh yeast: The yeast provides the leavening for the sweet bread, so it’s important to use fresh, unexpired yeast. It activates when soaked in warm water, forming a foamy mass. Old yeast will foam very little or not at all. If yours does not bloom well, start with a new pack.
- Let the dough rise in a warm, draft-free location: Place the dough in a warm, draft-free area—on top of a warm appliance, next to the baseboard, in a sunny window, or in the oven with the light on.
If you’ve never made yeast bread before but have always wanted to try, I encourage you to go for it! I took the liberty of providing in-depth information in the recipe card to guide you every step of the way.
Ingredients needed:
- All-purpose flour—provides the structure for the bread through the development of a gluten network. Make sure to measure it properly as instructed in the recipe card. Excess flour will result in dense, dry bread.
- Active dry yeast—yeast is essential for creating rise, texture, and flavor of the bread. Use fresh, unexpired yeast for the best results.
- Warm water—needed to activate the yeast. Using the correct temperature (105° F to 115° F) is essential for the best results. Too hot a temperature will kill the yeast.
- Lukewarm milk—the fat and sugar in the milk help create a soft crumb and sweetness.
- Granulated sugar—besides adding sweetness, it helps create softer crumbs, extend the bread’s shelf life, and brown the crust.
- Eggs—the fats, water, and protein in the eggs contribute to the structure and flavor. Eggs help create tender, rich crumbs, provide structure, moisture, flavor, leavening, and give the crust color through the Maillard reaction.
- Salt—adds flavor, affects fermentation, and helps strengthen the gluten strands for better rise and volume.
- Butter—adds flavor and moisture and helps the dough rise, creating soft, tender crumbs. It also contributes to crust color and shine.
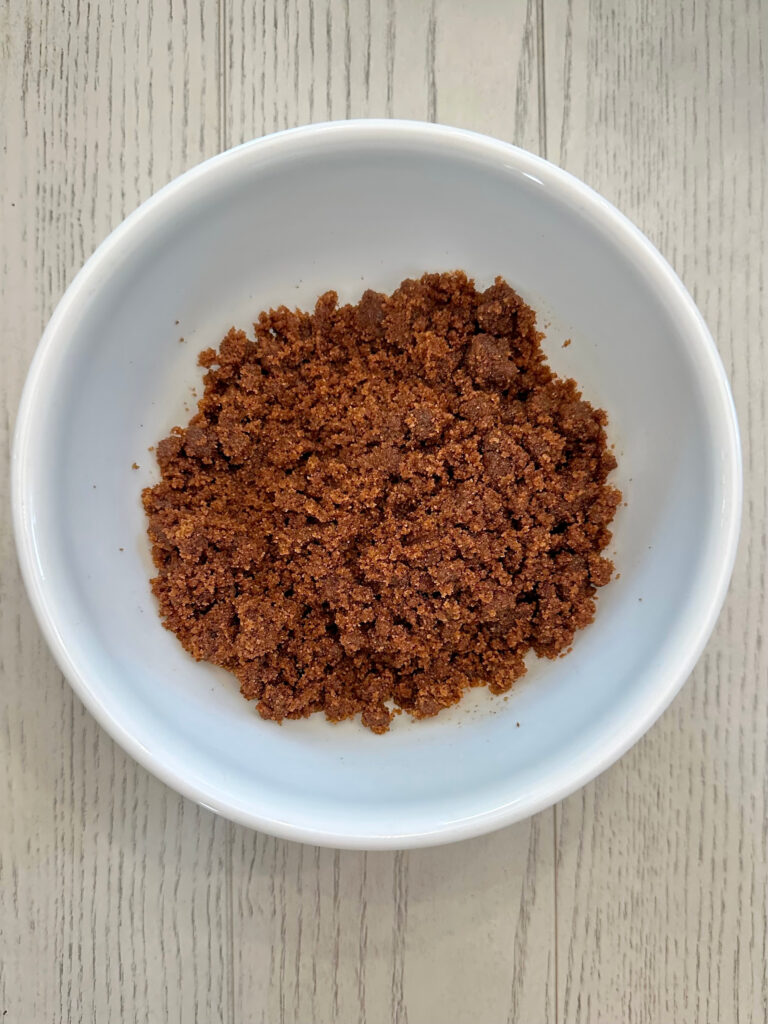
- Cinnamon and brown sugar—for the most delicious filling.
Recipe Highlights:
- Bloom yeast in warm water in the stand mixer bowl.
- Add milk, sugar, butter, and eggs. Blend with the paddle attachment.
- Add half of the flour and salt mixture, then the remainder in small increments. Beat until the dough begins to clump around the paddle.
- Switch to a dough hook attachment. Continue beating on number 2 (low on my KitchenAid stand mixer) until the dough is elastic, smooth, and slightly tacky.
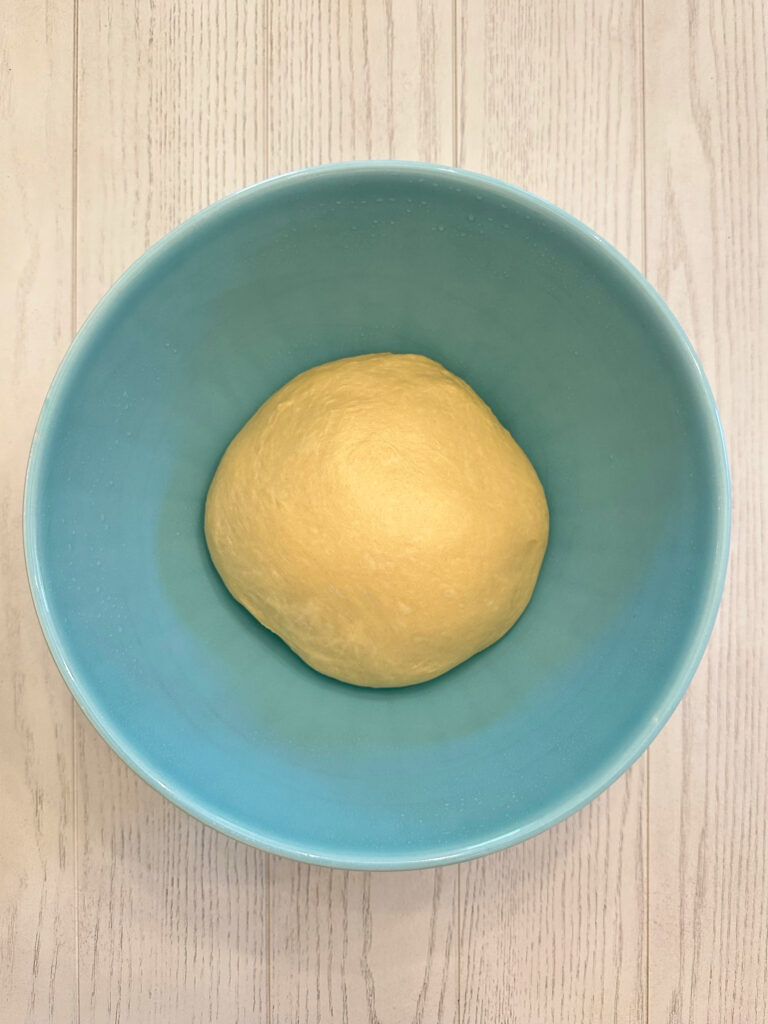
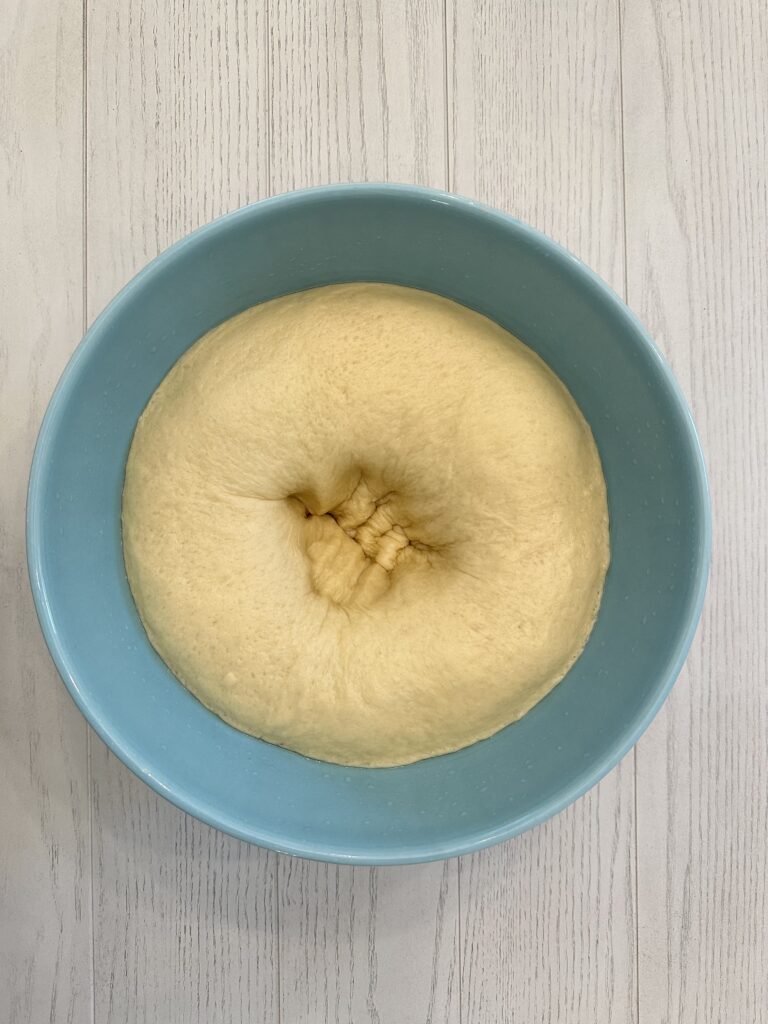
- Shape the dough into a ball and place it in a greased bowl. Cover with a plastic wrap or a damp kitchen towel and allow to proof in a warm area until doubled in size (about 1 1/2 to 2 hours).
- Just before the dough finishes rising, make the cinnamon sugar filling by combining all of the filling ingredients in a bowl.
- Punch down the dough, then shape it into a 10-inch log.
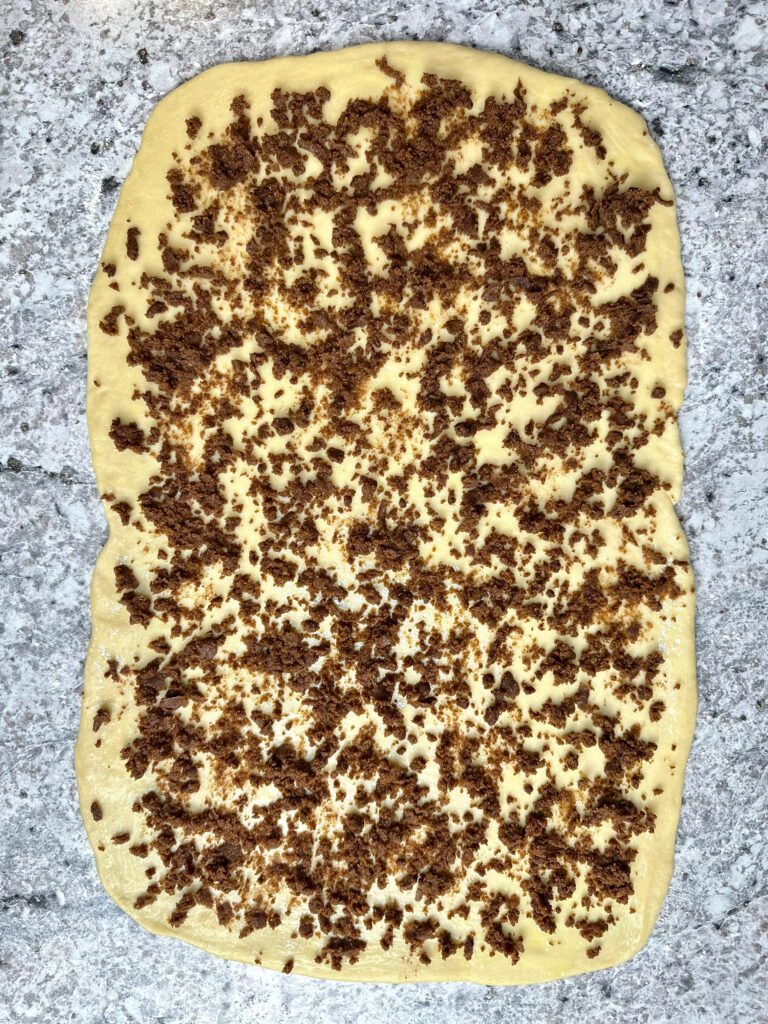
- Roll the dough into a 12 x 16-inch rectangle and brush the surface with egg wash. To spread the thick filling evenly, scoop some into your hand and gently rub it between your fingers to break it into fine pieces, letting them fall evenly over the dough.


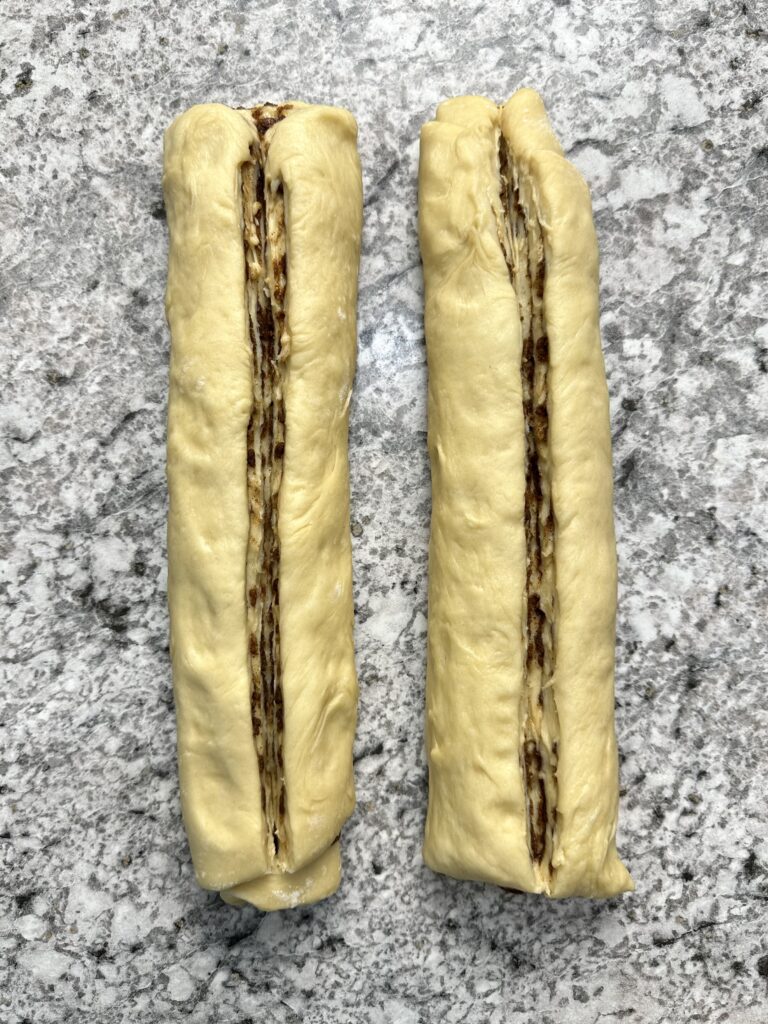
- Roll the dough into a log starting on the 16-inch long side. Slice the log in half horizontally. Then, make a vertical cut down each log, cutting almost halfway deep.
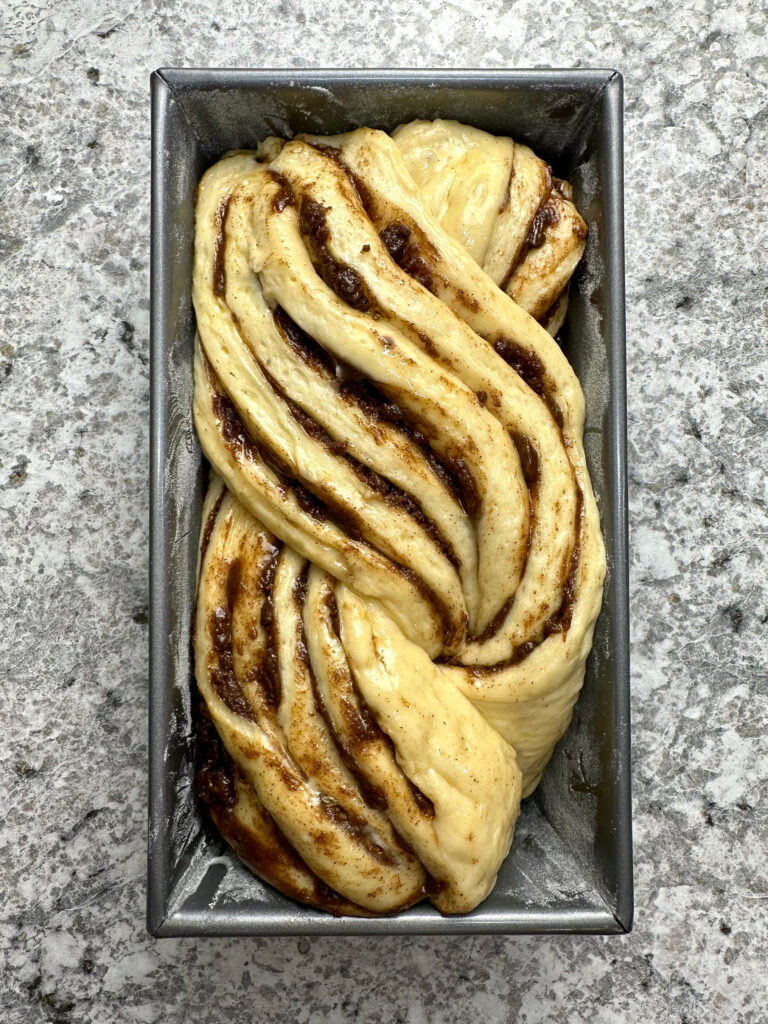
- Twist the logs together to make a rope, then tuck the ends underneath. Place it in a prepared 10 x 5 x 3-inch loaf pan. Cover loosely with a greased plastic wrap or a damp kitchen towel. Let it rise a second time (proof) for 1 hour in a warm draft-free location.
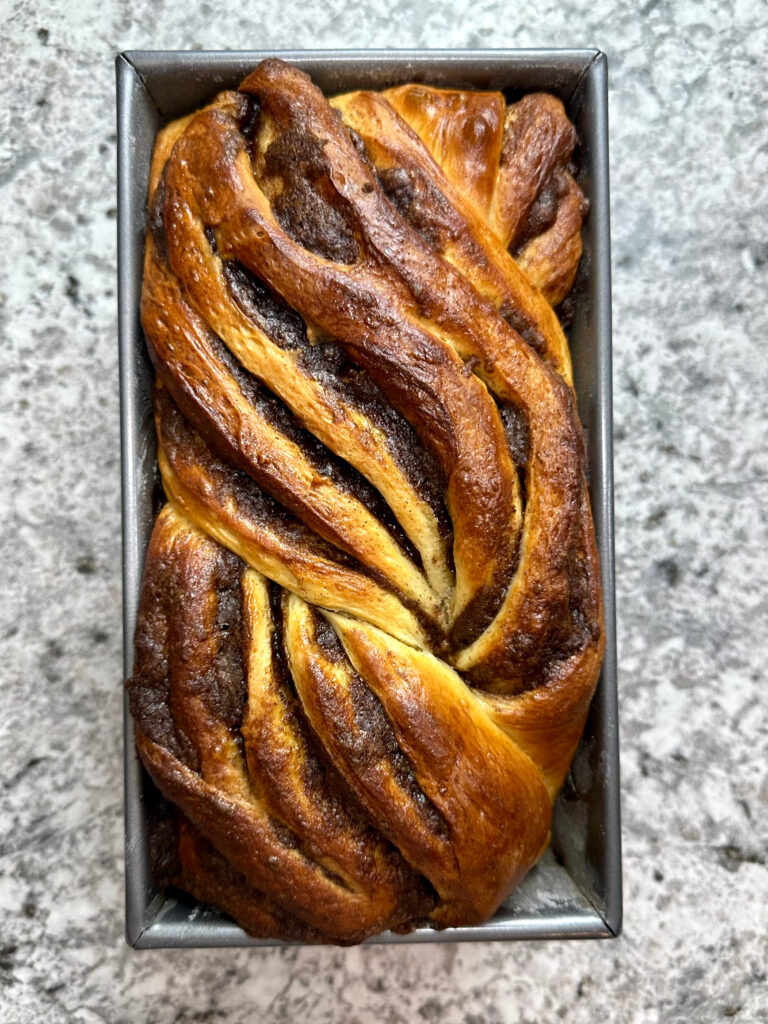
- Brush the top with beaten egg. Bake in a preheated 350° F oven for 25 to 30 minutes or until a toothpick comes out with a few dry crumbs attached.
- Rub butter on the crust. Allow the bread to cool for 10 minutes before unmolding, then allow it to cool completely on a cooling rack.
- Detailed instructions are in the recipe card section below.

This bread is great for breakfast. All it needs is a pat of butter. My family loves to butter and brown it in a skillet. It becomes deliciously fragrant and caramelized. Trust me, it’s hard not to eat the entire loaf!
How to tell when the dough is properly kneaded:
The stand mixer does all of the work for you. Sufficiently kneaded dough will pull away from the sides of the bowl. It will be smooth, springy, and slightly tacky to the touch, but won’t stick to your finger. And when you poke it, it should spring right back.
You can also perform the windowpane test by pinching off a small, golf ball-sized piece of dough. If you can stretch it to an almost transparent, thin sheet without tearing, it is properly kneaded. If the dough tears, it needs more kneading.
Over-kneaded dough feels stiff, tight, and inelastic. It also breaks easily when stretched. The bread will be dense, crumbly, and not well-risen once baked. To reduce the effects of over-kneaded dough, letting the first rise extend a little longer to relax the gluten helps lessen the severity.
How to tell when the dough has risen enough:
The first rise, after kneading the dough, is also called bulk proofing or bulk fermentation. It is essential for developing the dough’s structure, texture, and flavor through yeast fermentation. The dough has risen properly when it doubles in size.
The second rise is called proofing or final proof, and it helps to restore and improve the texture, structure, and flavor after the dough has been deflated and shaped following the first rise. It does not quite double in size during the second rise.
You can check whether the bread dough has proofed enough after the second rise with the poke test. In this method, gently press an indentation into the dough with a slightly floured finger (or a knuckle if you have long nails). The three possible outcomes are:
- If it springs back slightly, it is sufficiently proofed.
- If the dough springs back up, it needs more time to proof.
- If it remains sunken, it has been overproofed. The baked loaf may have dense, coarse crumbs and not be well risen.
How to serve:
This Cinnamon Sugar Portuguese Sweet Bread has a light, fluffy crumb and is utterly delicious on its own. That said, it’s incredible toasted with a slathering of butter, which is our favorite way to enjoy it, and perfect for breakfast or a snack.
How to store:
Allow the bread to cool completely before storing it in an airtight container or a zip-lock bag with the excess air removed, and store it at room temperature for up to 4 days. I’ve tried storing it in the refrigerator, but I don’t recommend it since the bread dries out easily.
For longer storage, keep the bread in the freezer. First, let the bread cool completely. For easy access to individual servings, slice it beforehand, but you can also freeze it whole. Wrap the bread in plastic wrap (or individual slices), then place it in a large freezer bag or wrap it with aluminum foil. Freeze for up to 3 months. To thaw, let it sit at room temperature.
Recommended supplies:
Affiliate links. The products I recommend are either what I use, are on my wish list, or are highly rated.)
- Active dry yeast to leaven the bread. This is the brand I use.
- Stand mixer—I have this brand. This 4.5-quart capacity is the same size as I use.
- Rolling pin
- Pastry brush for applying egg wash.
- Loaf pan—this recipe requires a 10 x 5 3-inch loaf pan.
- Kitchen towel for covering dough while it proofs. You can also use plastic wrap instead.
Check out Prime Big Deal Days on Amazon Prime. Up to 50% off!
You Might Also Like
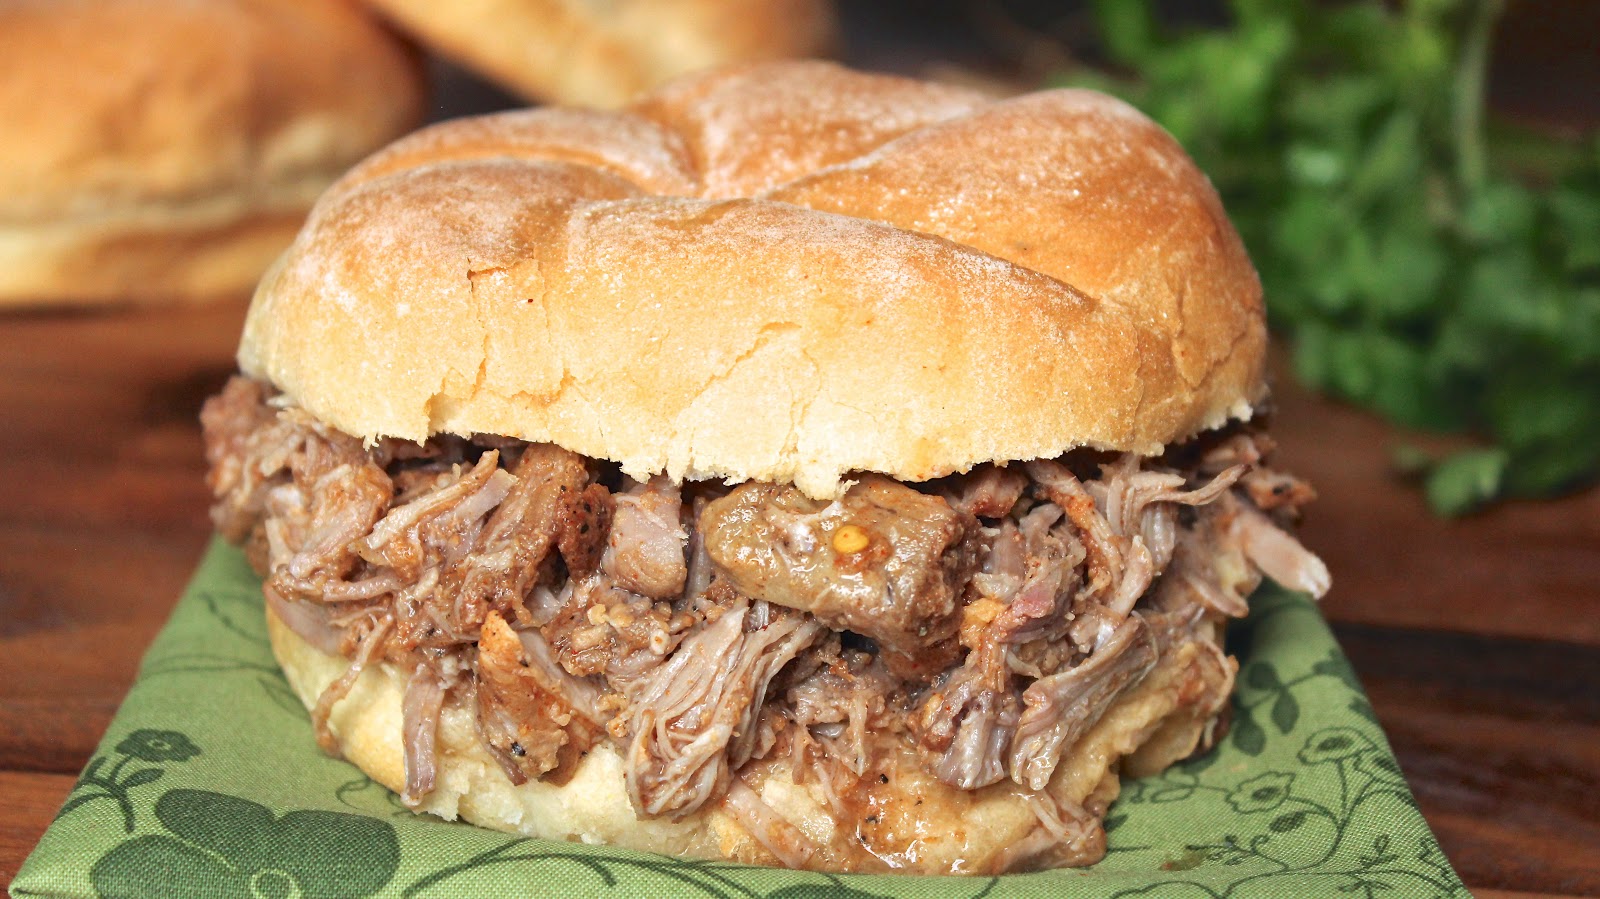 Cacoila Sandwich (Portuguese Pulled Pork)
 |
 Queijadas (Portuguese Custard Cupcakes)
|
 Cavacas (Portuguese Pastry)
|
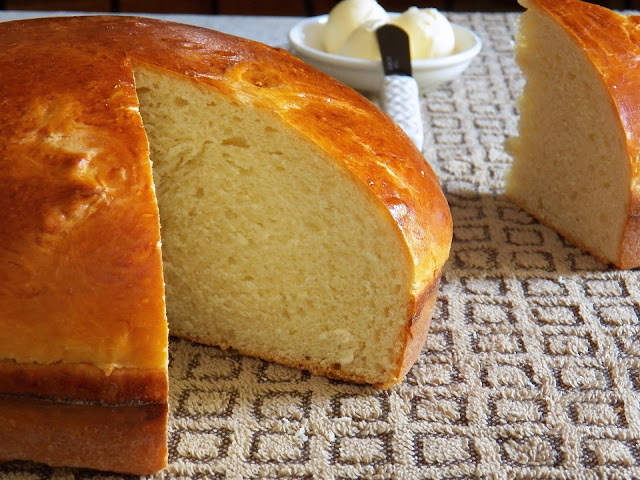 Portuguese Sweet Bread
 |

Portuguese Sweet Bread
Description
This Cinnamon Sugar Portuguese Sweet Bread has a soft, fluffy texture of traditional Massa Sovada—but with delicious swirls of cinnamon sugar. If you’re not already a bread lover, this loaf is guaranteed to win you over.
Ingredients
For the cinnamon sugar:
Suggested supplies (affiliate links):
Instructions
- Note: The dough is kneaded on setting number 2 using a KitchenAid stand mixer. If you use a different brand, follow the recommended kneading setting for your mixer, or use medium-low.
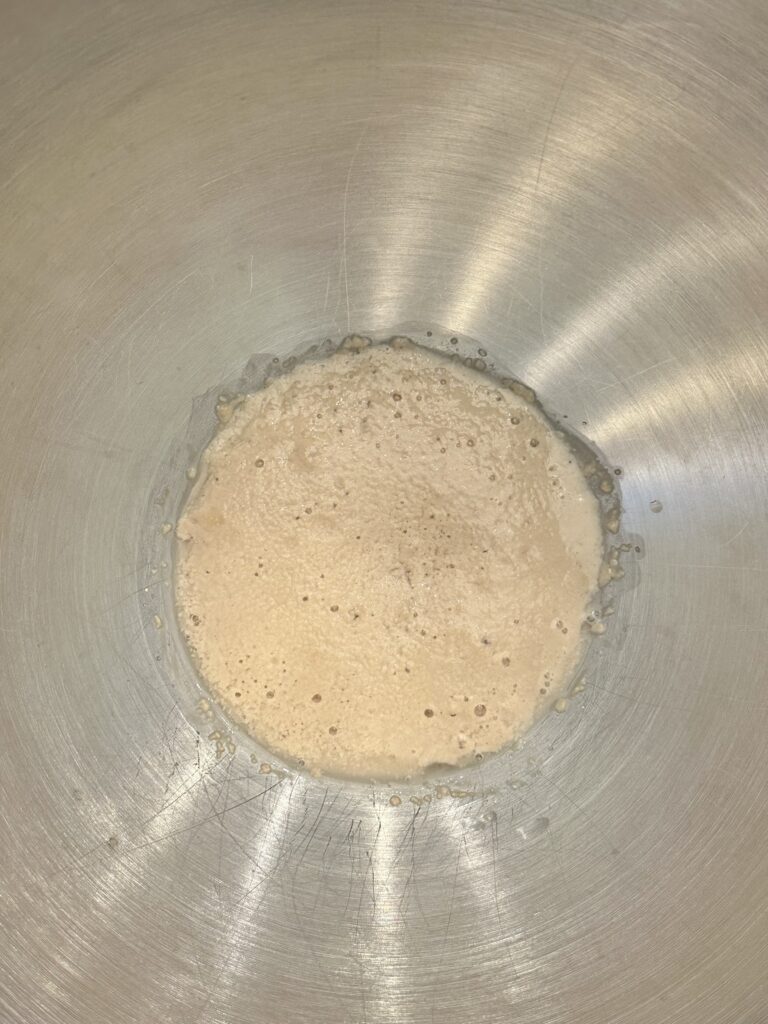
- Add yeast and water to the bottom of the stand mixer bowl. Let it sit for 5 to 10 minutes to bloom (activate). It’s ready to use when it forms a bubbly and foamy mass. Avoid using water that is too hot, as it will kill the yeast.
- Measure the flour into a separate bowl. Make sure to fluff it well with a fork first, then use a spoon to scoop the flour into the measuring cup. Avoid tapping or tamping down the cup. Use the flat end of a butter knife to level. Add salt. Mix well and set aside.
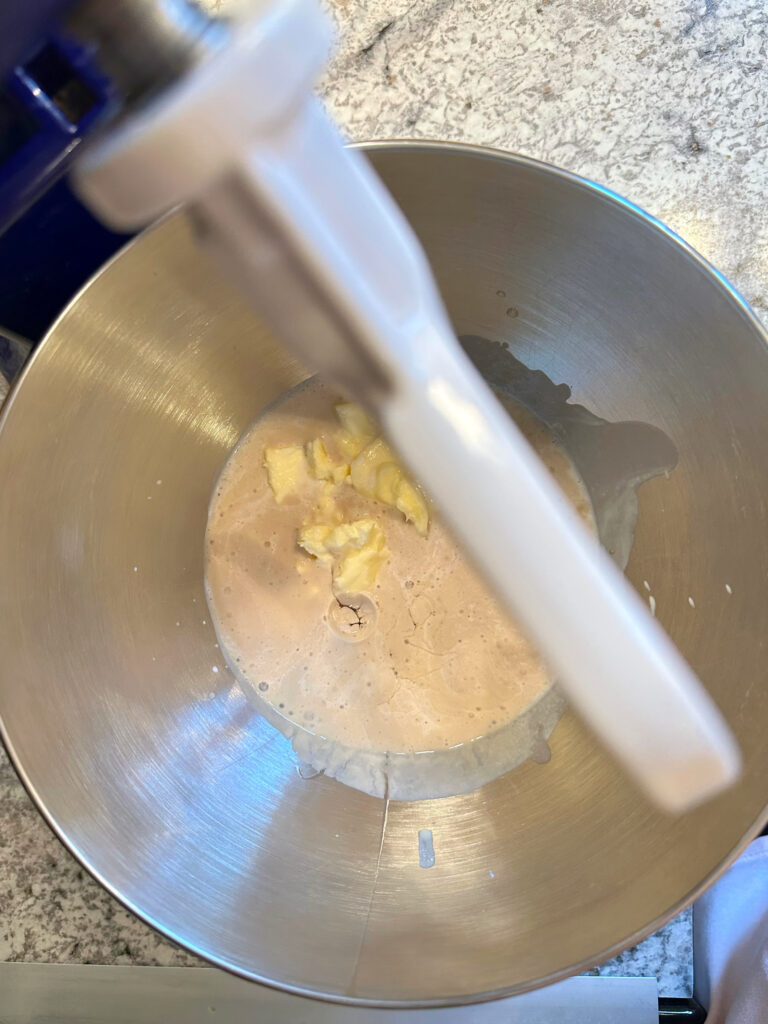
- Once the yeast has bloomed, add milk, sugar, butter, and 2 eggs. Attach the paddle attachment. Mix until the ingredients are well combined, about 1 minute.
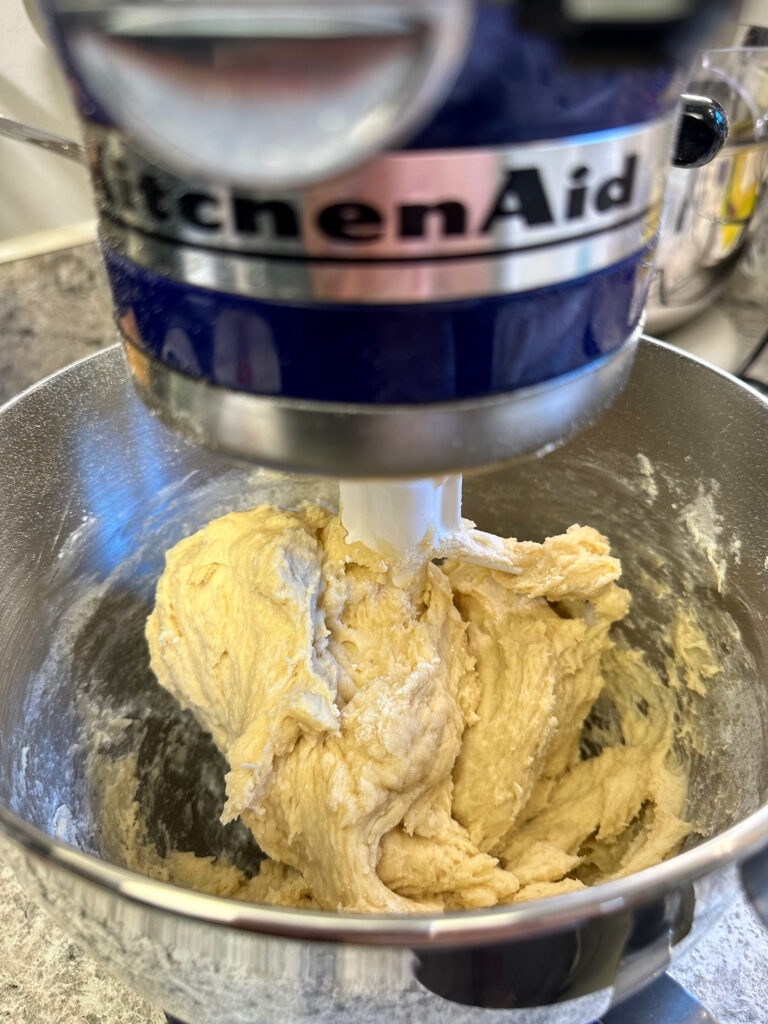
- Add half of the flour mixture, starting on low, then increasing to medium-low to incorporate. Continue adding 1/4 cup of flour at a time, waiting until it’s incorporated before adding the next. Scrape down the sides. Continue beating for 1 to 2 minutes until the dough becomes shaggy and clings to the paddle.
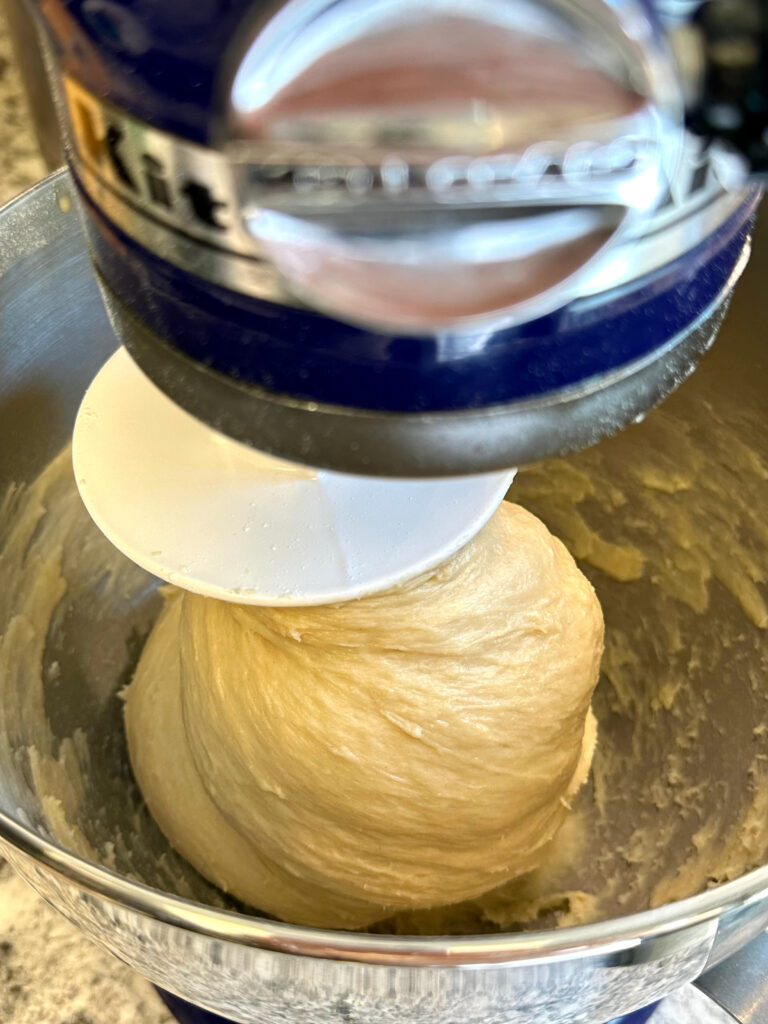
- Switch to the dough hook attachment to knead the dough. Scrape down the sides of the bowl. Beat on speed 2 for an additional 7 to 9 minutes or until the dough is smooth and elastic, occasionally scraping the sides of the bowl. As the dough firms up, it will wrap around the hook and slap against the sides of the bowl as it’s kneaded.
- Checking for properly kneaded dough: Start testing at the 6-minute mark of kneading. It should be smooth, springy, and slightly tacky to the touch, but shouldn’t stick to your finger. It should also spring back quickly when poked. Continue kneading if the dough
doesn’t have these characteristics, then check every minute. - Using a rubber spatula or lightly greased hands, scrape the dough and form it into a ball. Place into a greased bowl. Cover with a greased plastic wrap or a damp kitchen towel. Place in a warm area, such as under a light, to rise until doubled in size (about 1 1/2 to 2 hours).
- Just before the dough finishes rising, make the cinnamon sugar filling by combining all of the filling ingredients in a bowl. Set aside. In a separate bowl, combine 1 egg and 1 tablespoon of water for the egg wash. Whisk briskly until smooth. Set aside.
- Once the dough has doubled in size, punch it down, then shape it into a 10-inch log. Place it on a floured work surface, then use a rolling pin to roll it into a 12 x 16-inch rectangle.
- Brush some egg wash onto the surface of the dough, then refrigerate the remaining. The filling is too thick to spread onto the dough with a spatula without tearing it. To spread it evenly, scoop some into your hand and gently rub it between your fingers to break it into fine pieces, letting them fall evenly over the dough. Continue this process to evenly coat the dough with the mixture, leaving a 3/4-inch border along one of the 16-inch sides untouched. Use a spatula to gently spread out any large clumps.
- Roll the dough into a log starting from the side opposite the 3/4-inch border without filling. Cut the log in half horizontally. Then, make a vertical cut down each log, cutting almost halfway deep to reveal some of the filling. Place one log over the other with the cut sides facing up to form an X. Twist the logs together to make a rope, then tuck the ends underneath.
- Gently transfer the shaped dough to a buttered and floured 10 x 5 x 3-inch loaf pan. Cover loosely with greased plastic wrap or a damp kitchen towel. Let it rise a second time for 1 hour in a warm, draft-free location. The dough will not double in size, but should rise about 50%. If it hasn’t, allow it to rise a little longer.
- Brush some of the reserved egg wash over the loaf. Place it in a preheated 350° F oven and bake for about 25-30 minutes, until the crust is medium to dark amber. It’s done when a wooden toothpick comes out clean or with dry crumbs attached. To check with a thermometer, it’s done when the internal temperature reaches 190° F.
- Brush the top with a chunk of butter to soften the crust. Allow the loaf to cool for 10 to 15 minutes, then run a butter knife around the edges to loosen. Turn it out onto a cooling rack and allow it to cool completely.
- Makes 8 servings.
Making the dough:
Tip: If a good amount of dough sticks to the sides of the bowl 2 minutes after your final addition of flour, add 1 to 2 tablespoons of flour, waiting 30 seconds in between.
Over-kneaded dough will feel stiff and rubbery. It will also be hard to shape. The dough will lack elasticity and break or snap easily when pulled. Bread baked with over-kneaded dough will be dense and crumbly. Checking frequently in the last few minutes of kneading can help prevent this.
The first rise:
I let it rise in my oven with the light on.
Make the filling and roll the dough:
Apply the filling:
I prefer using cinnamon sugar mixed with melted butter as a filling, rather than sprinkling dry cinnamon sugar onto a buttered dough, because the dry filling falls out easily when the dough is twisted into a rope shape.
Shape the dough:
The final rise (final proofing):
Baking and cooling:
Note:
- Let the dough rise in a warm, draft-free location: Place it in the warmest, draft-free area you have. A warm, sunny, draft-free spot is great. I let it rise in an oven with just the light on.
Disclosure: This site contains paid advertising and affiliate links. In Good Flavor is a participant in the Amazon Services LLC Associates Program, an affiliate advertising program designed to provide a means for sites to earn advertising fees by advertising and linking to Amazon.com.